Hello!
With this programming, I will start a series about AWS, in which I will show how to use various AWS services, and automate them using terraform and the AWS SDK. And let’s start with the EC2 service.
EC2 is the core compute component of AWS. In practice, EC2 makes life easier for developers by providing scalable, secure computing power on AWS. It makes scaling up or down much easier, can be integrated with several other services, and comes with a plan where you only pay for what you use.
UI Overview
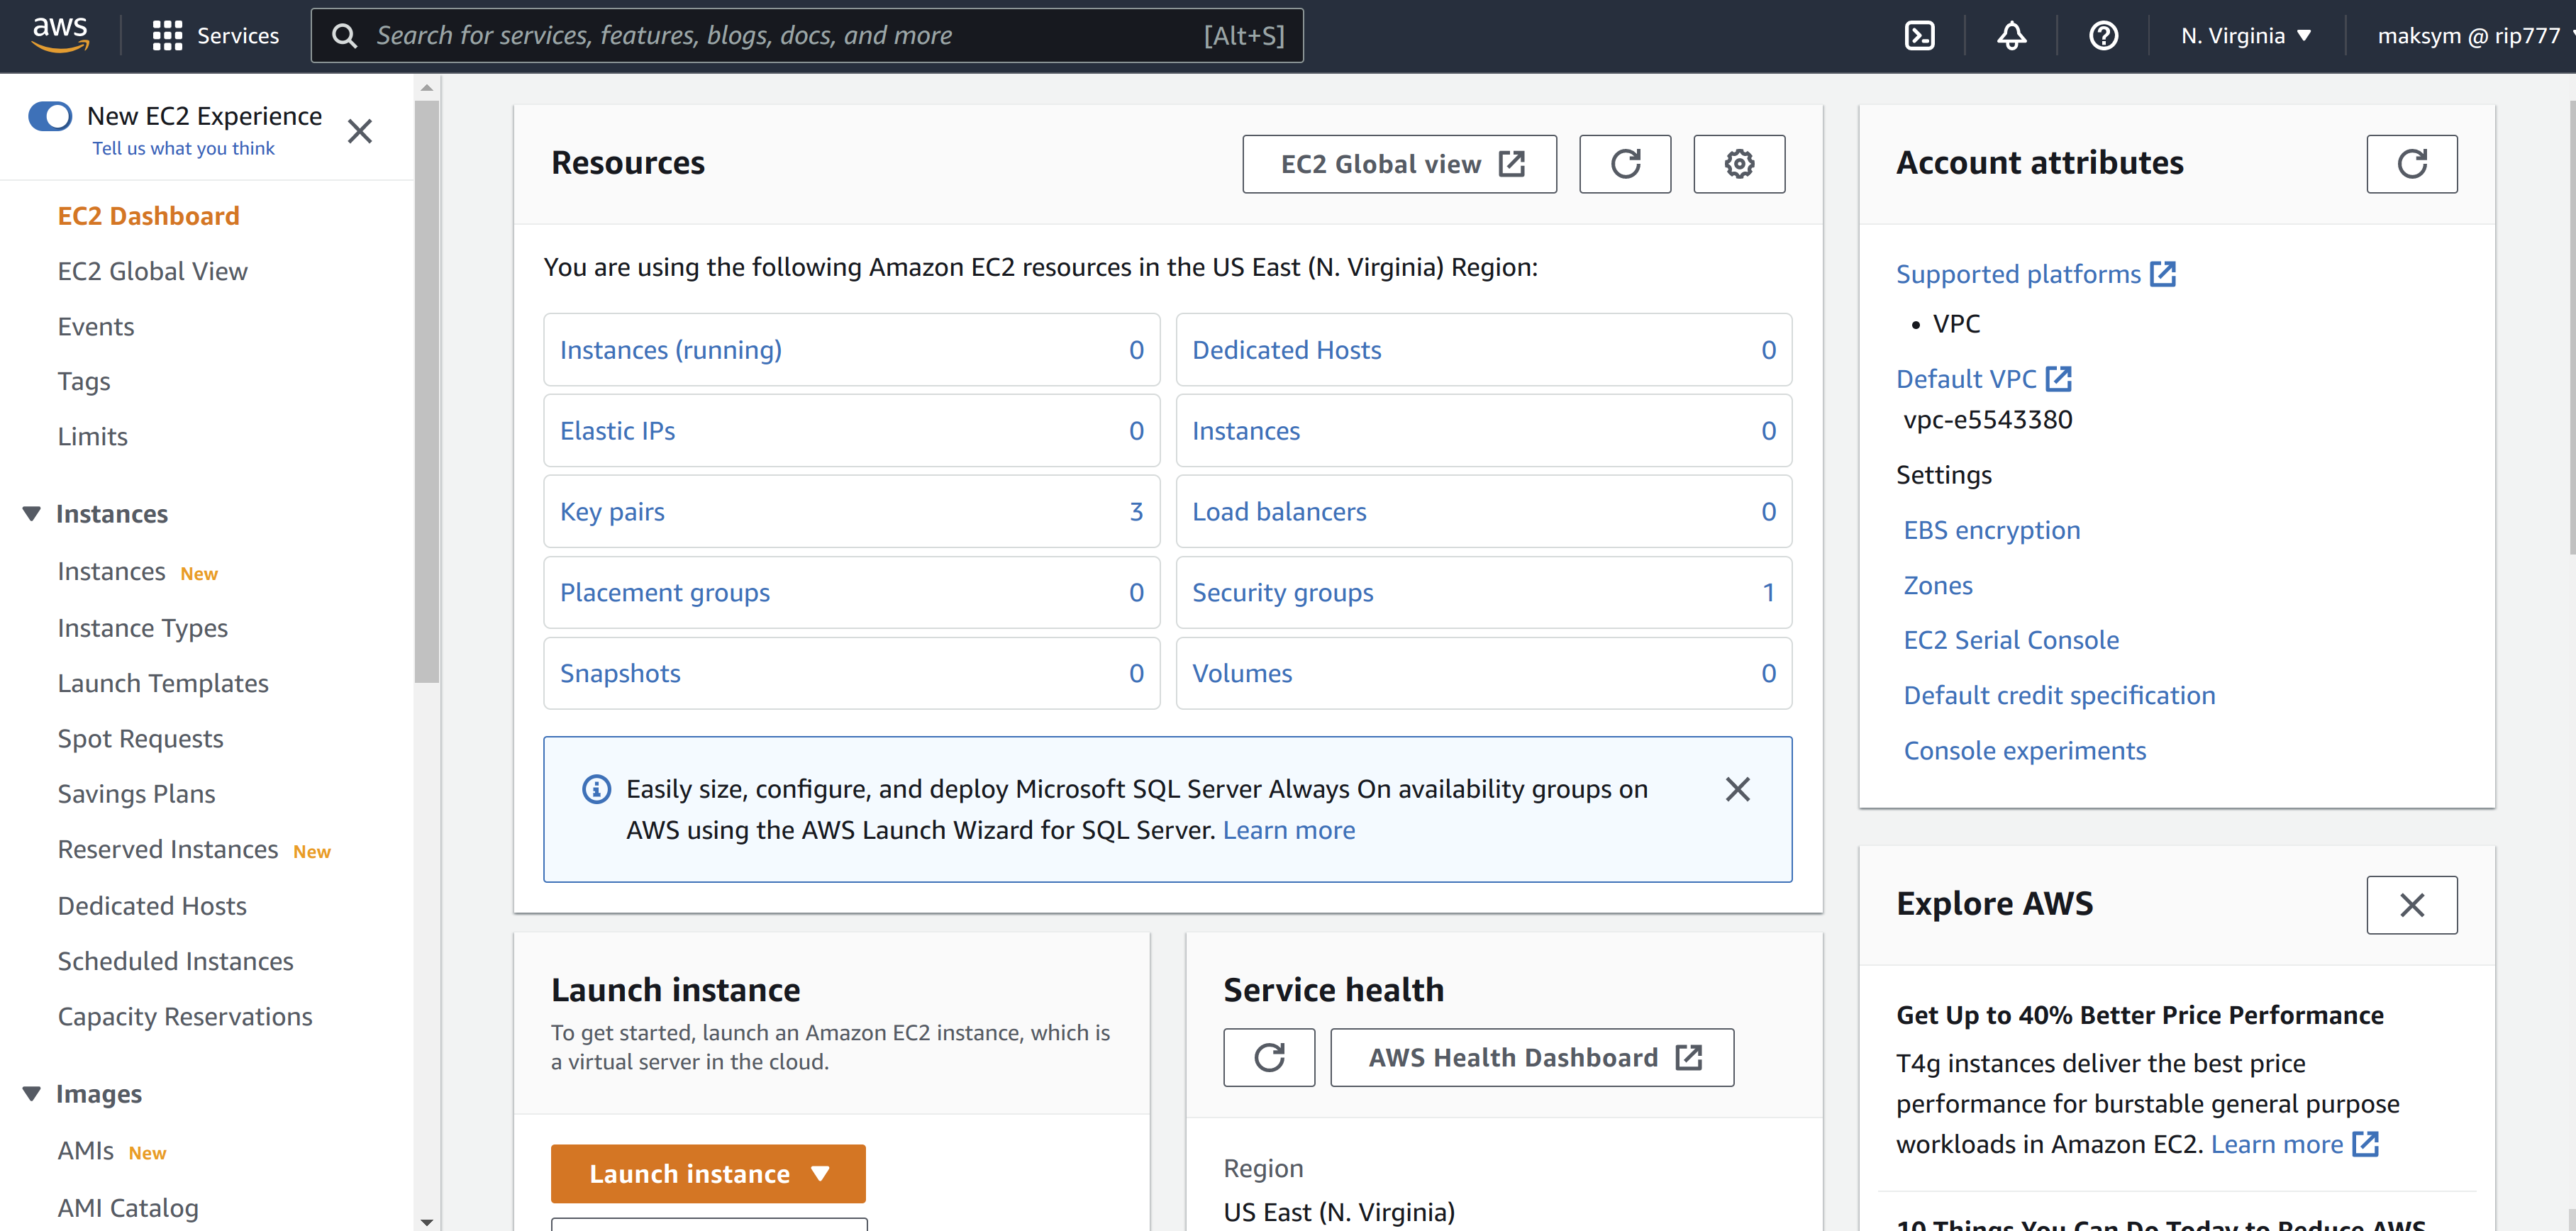
This is what the EC2 UI looks like. It has several categories:
- Instance
- Images
- EBS
- Network & Security
- Load Balancing
- Auto Scaling
Instance
In the instance section, you can create instances, view existing ones, and create templates of instance configurations for further reuse. To create an instance, you need to click Launch Instance.
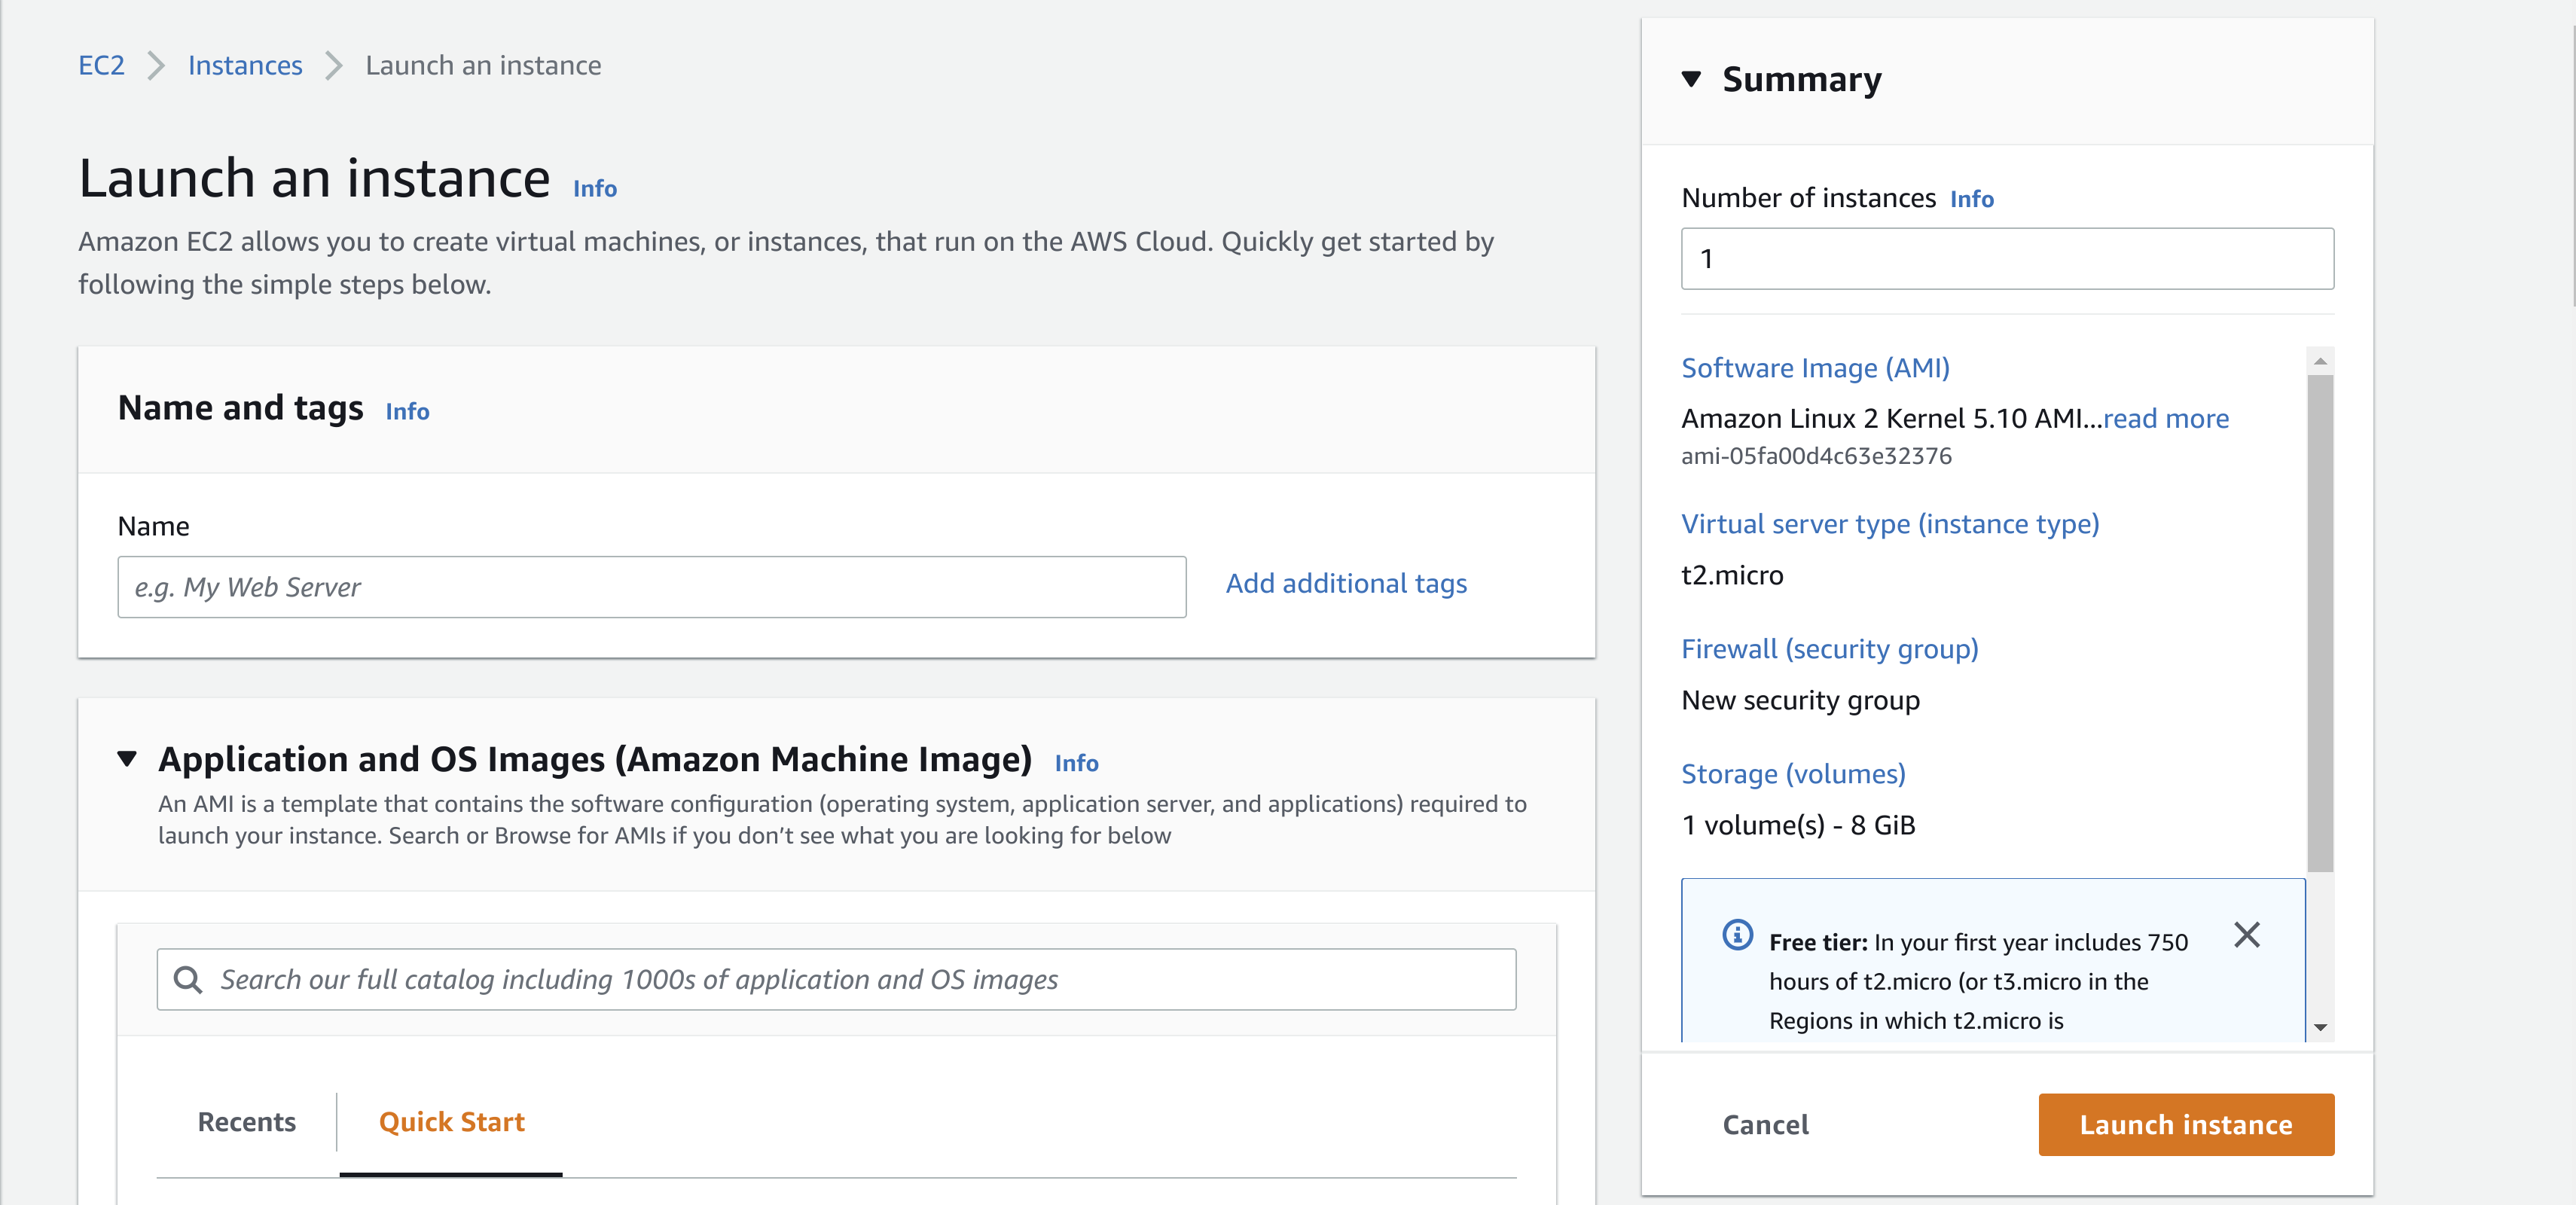
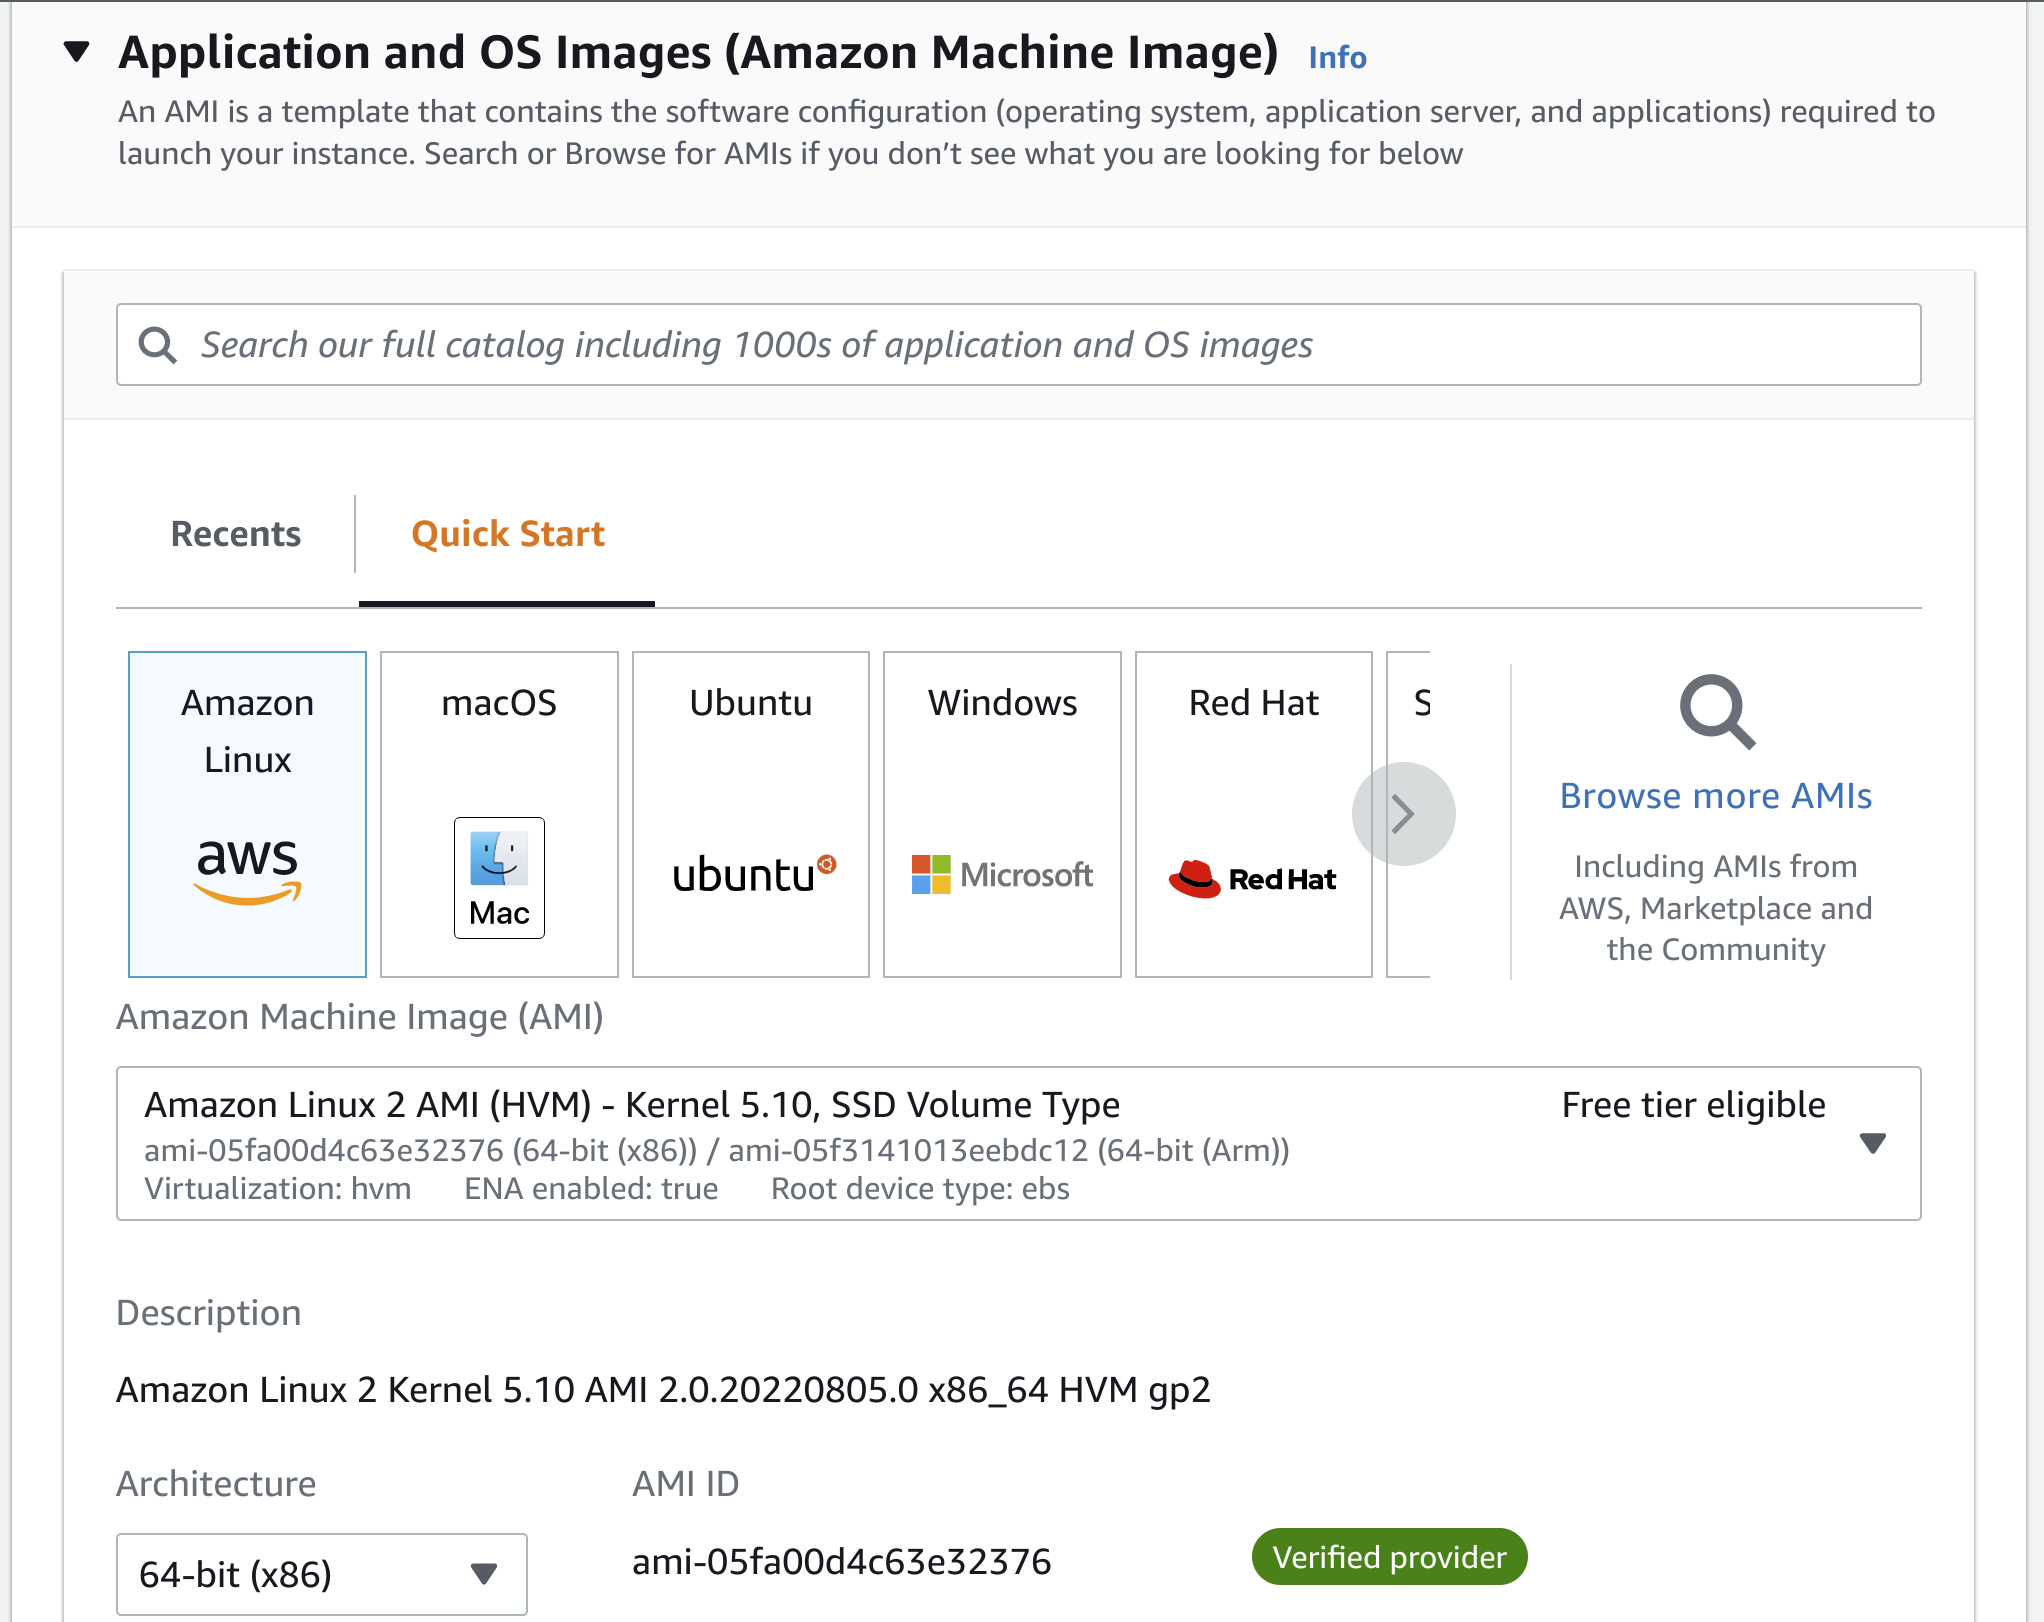
Here we need to specify the attributes of our future instance. AMI is mandatory. AMI is an image of the operating system that will be used for EC2. It can be a clean OS without additional settings, or an image with certain settings, for example, with LAMP Stack or WordPress.
The next mandatory parameters are Instance Type and Key Pair. The type of instance determines how much RAM and processor cores it will have. Depending on the type of instance, the price will be determined.
Different types of instances have different purposes:
- General purpose - balance computing, network resources, and memory. They can be used for many different workloads. These instances are ideal for applications that use such resources in equal amounts, such as web instances and code repositories. Types T and M
- Computationally optimized - ideal for applications with computational speed limitations that can use high-performance processors. instances in this family are well-suited for batch workloads, multimedia transcoding, high-performance web instances, high-performance computing (HPC), scientific modeling, dedicated game and ad instances, machine learning inference, and other applications that require large computing resources. Type C
- Optimized for memory - provide high performance of workloads related to the processing of large data sets in memory. Type R
- Accelerated computing - use hardware accelerators (coprocessors) for operations such as floating-point calculations, graphics processing, and mapping of data samples, and as a result, perform them more efficiently than is possible when the software runs only on the CPU. Types P, G, F
- Storage-Optimized - Storage-optimized, suitable for workloads that require sequential access for multiple read and write operations to large data packets on local storage. They are optimized to deliver tens of thousands of random I/O operations per second (IOPS) to applications with low latency. Types I, D
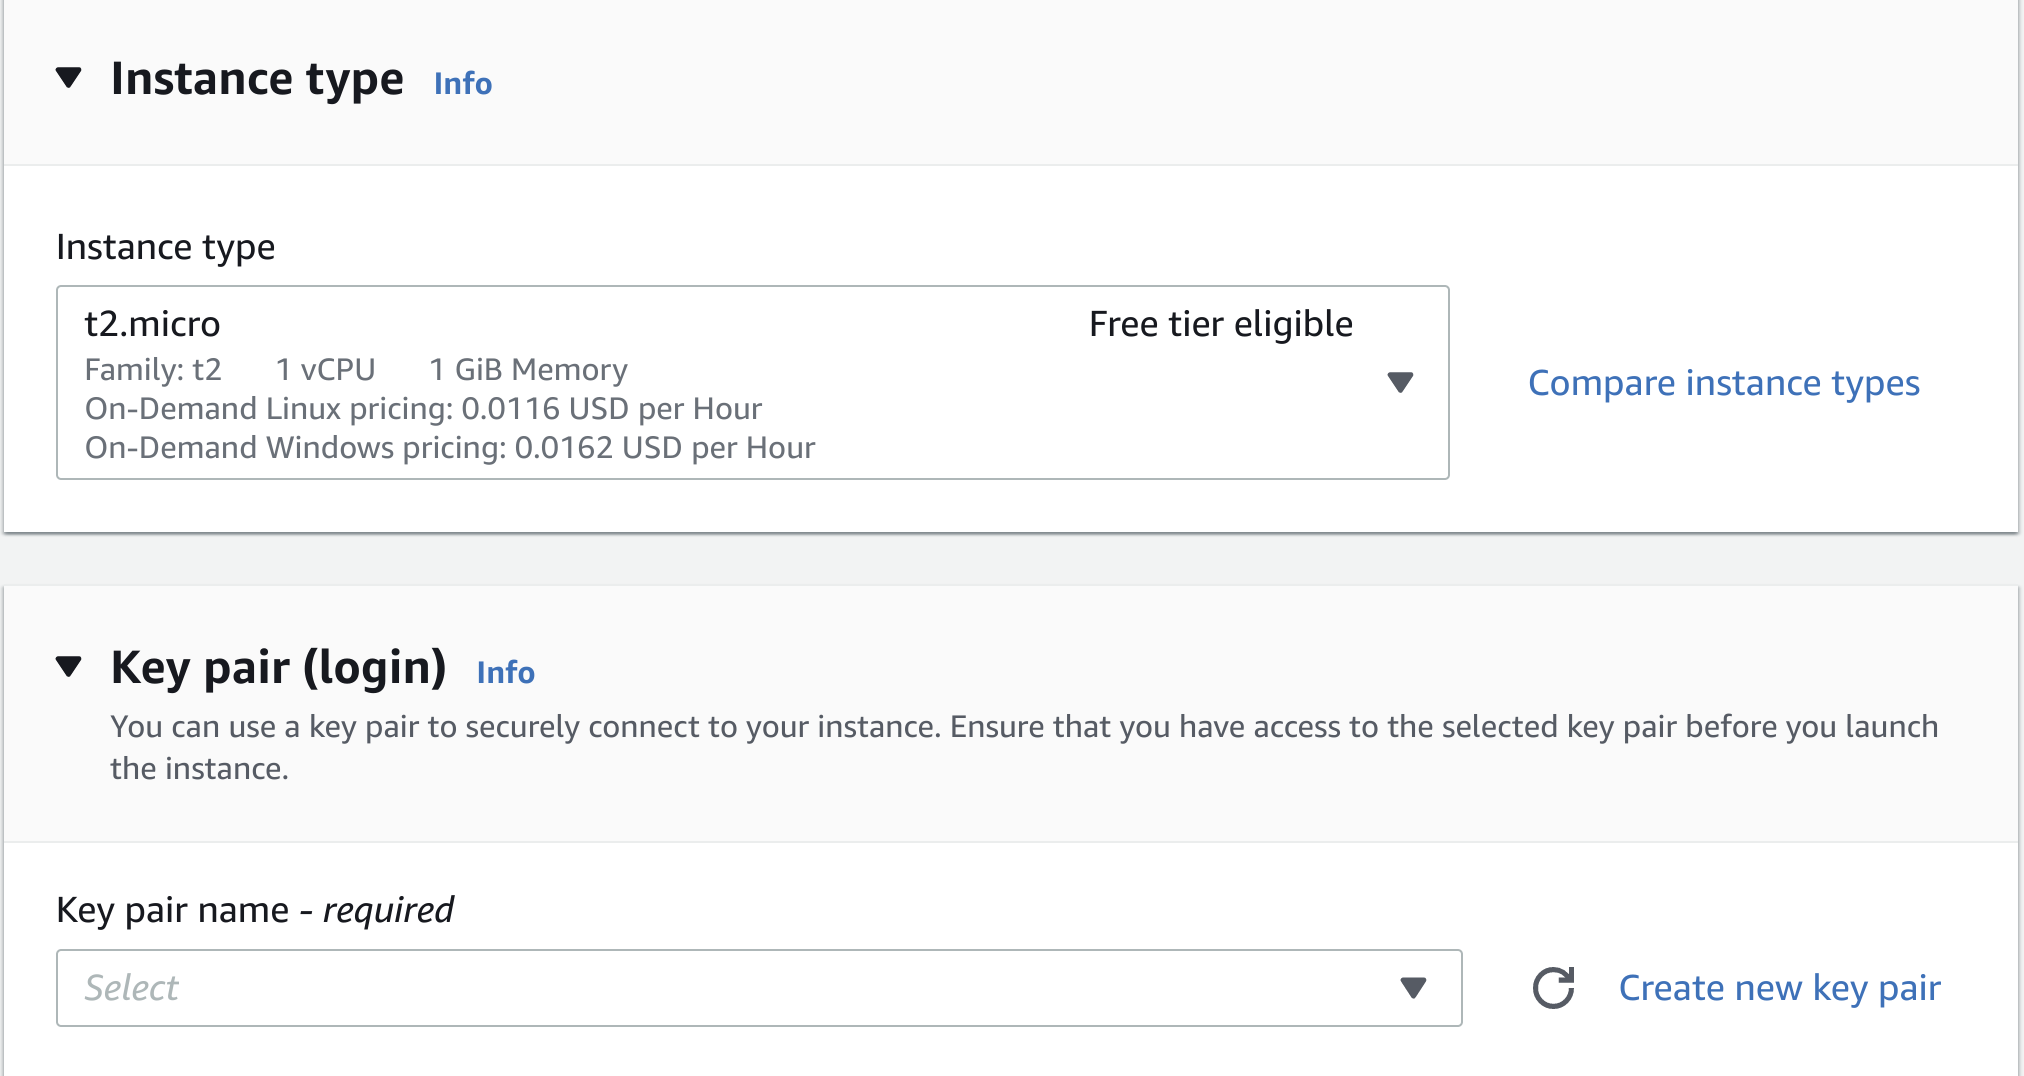
Key Type indicates which ssh key will be used to access the instance, or not to use a key at all. In this case, there will be no ssh access to the instance.
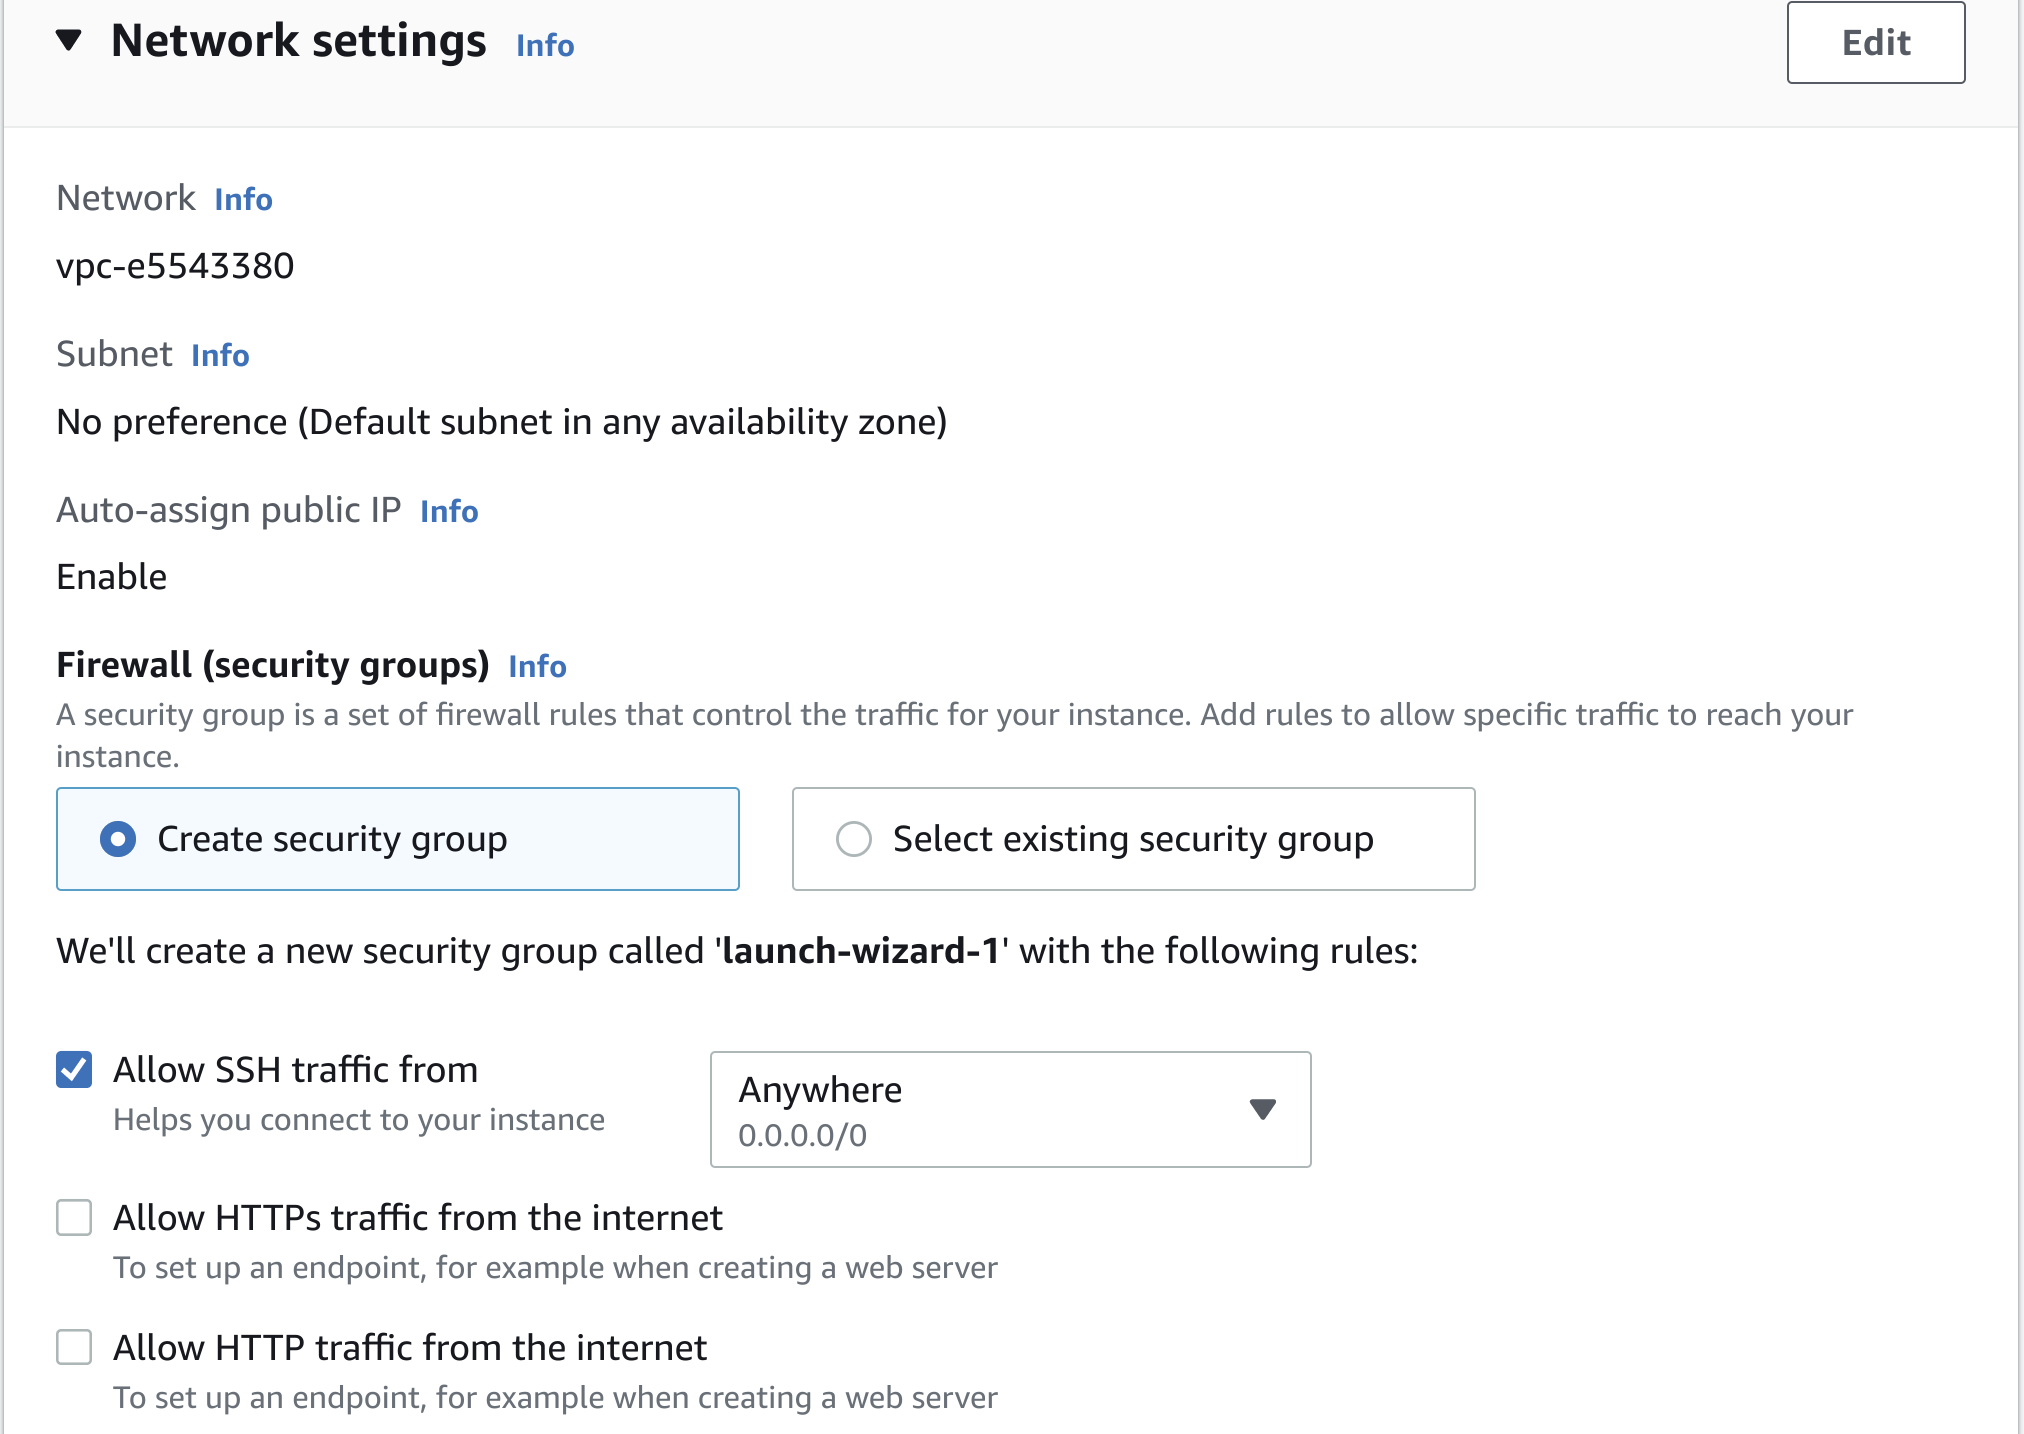
This section specifies which subnet will be used for the instance and which security group to use. Security Group is a firewall that controls which ports will be opened on the instance
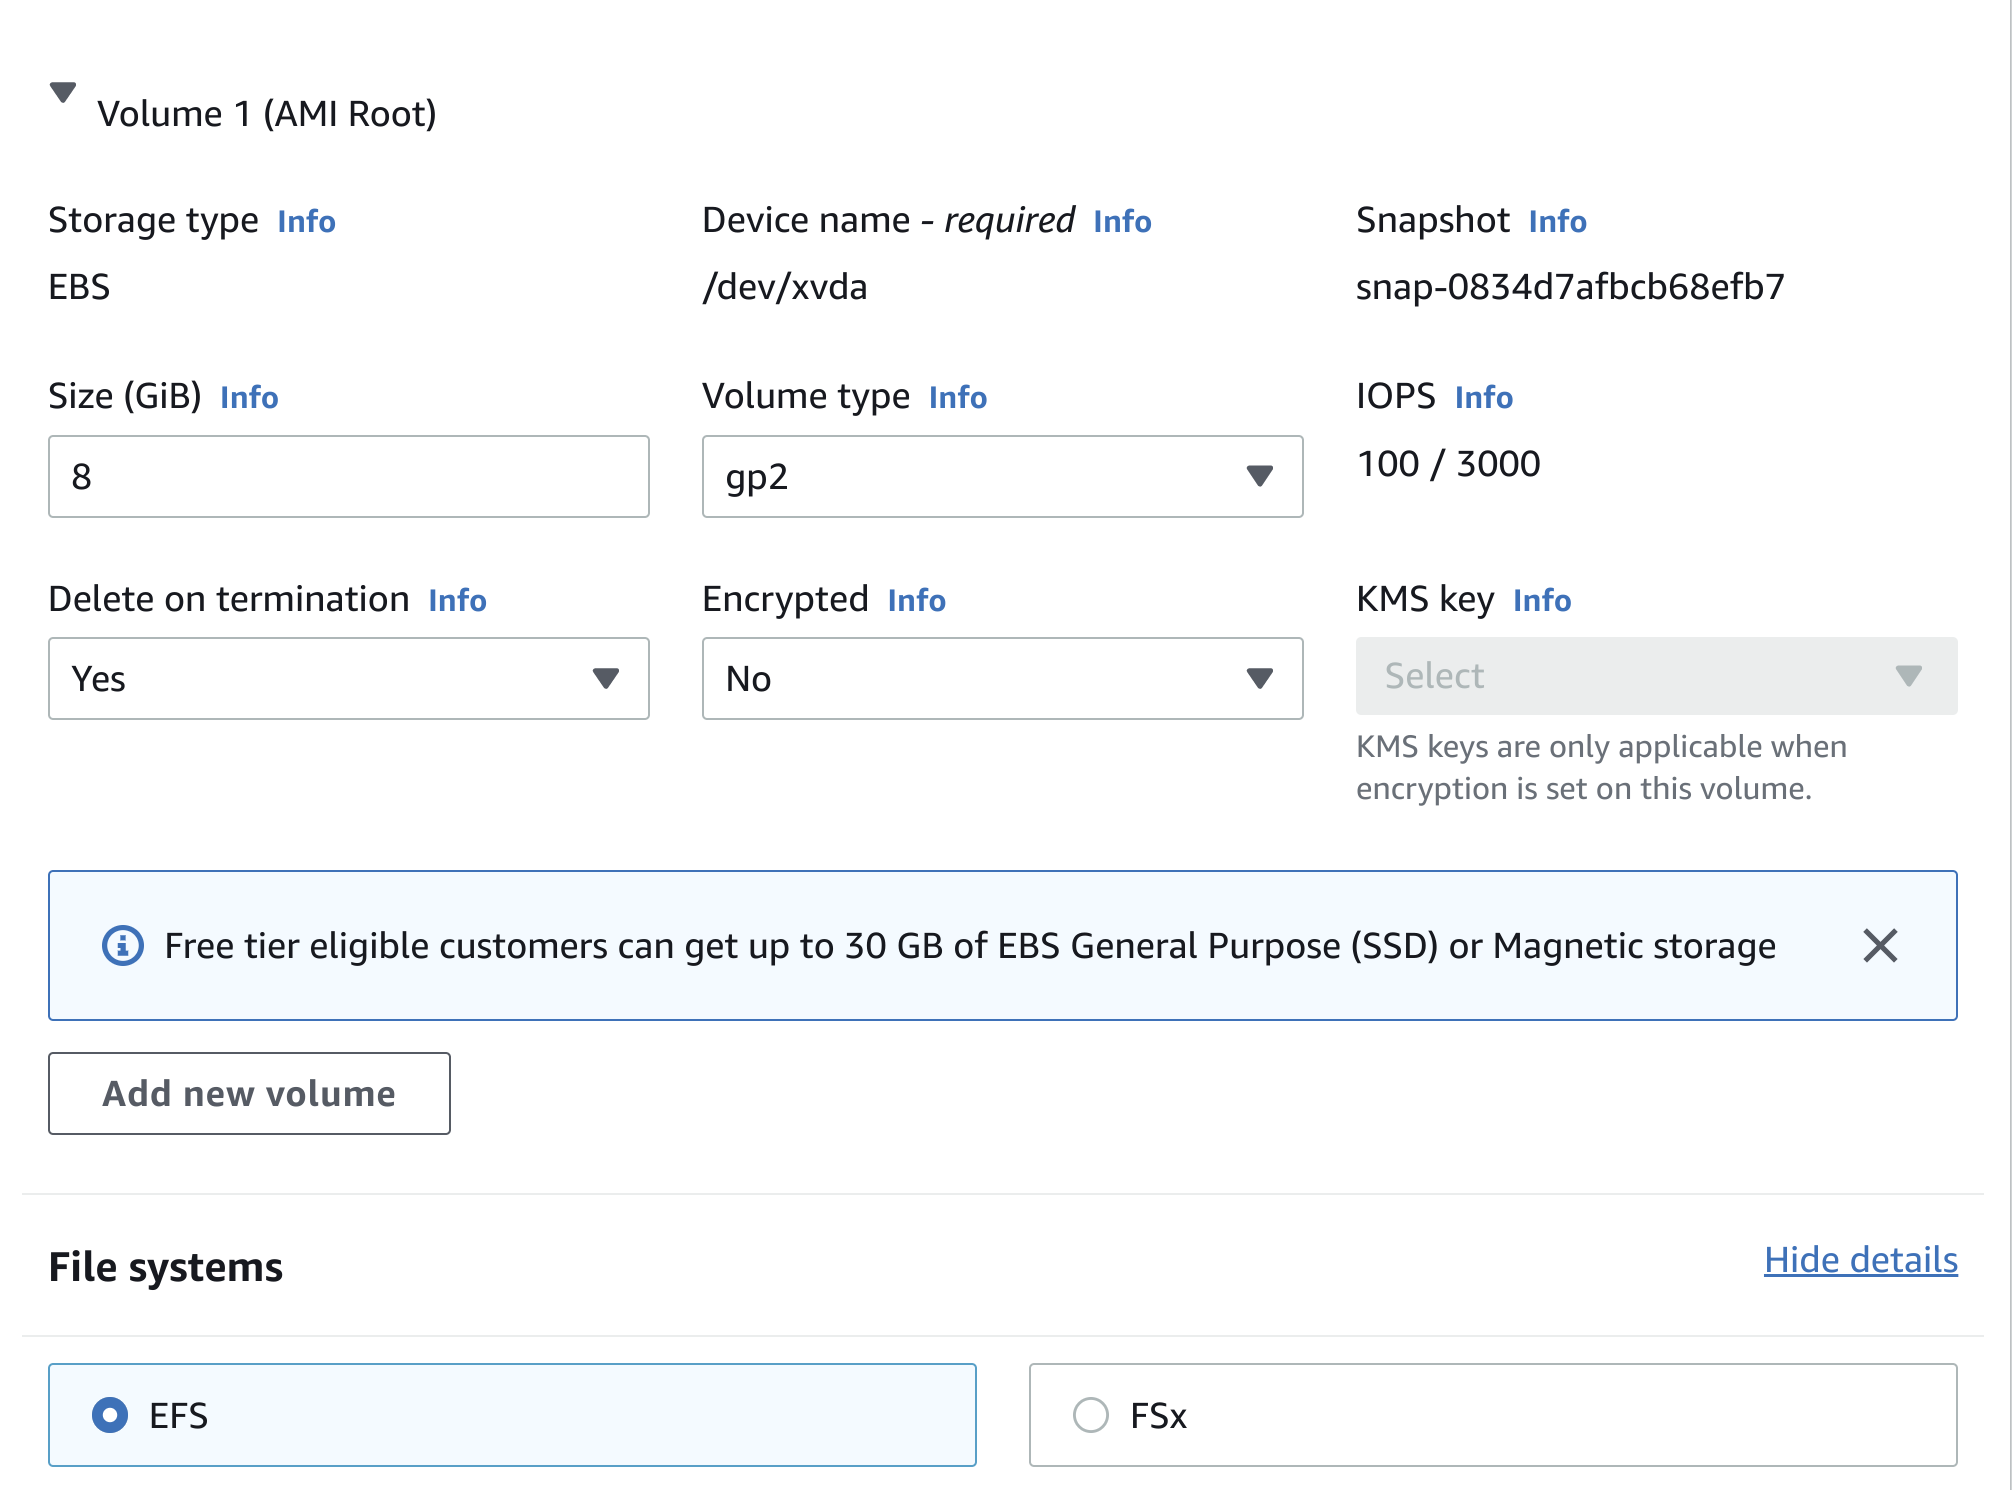
In this section, you configure the size and type of disk for the instance, and you can mount the additional file system like EFS or FSx.
Tags are also an important category, you should always add at least a few so that in the future you can find out whose instance this is, what environment it belongs to, its purpose, etc. Tags are key-value pairs, for example, Name = Webinstance.
The last section is Advanced details. Where you can specify many other parameters, the most important of which are the IAM instance profile (determines access to which AWS resources will be from this instance), and User Data (the script that is executed when the instance is created).
After all, parameters are specified, click Launch Instance and the instance will be created.
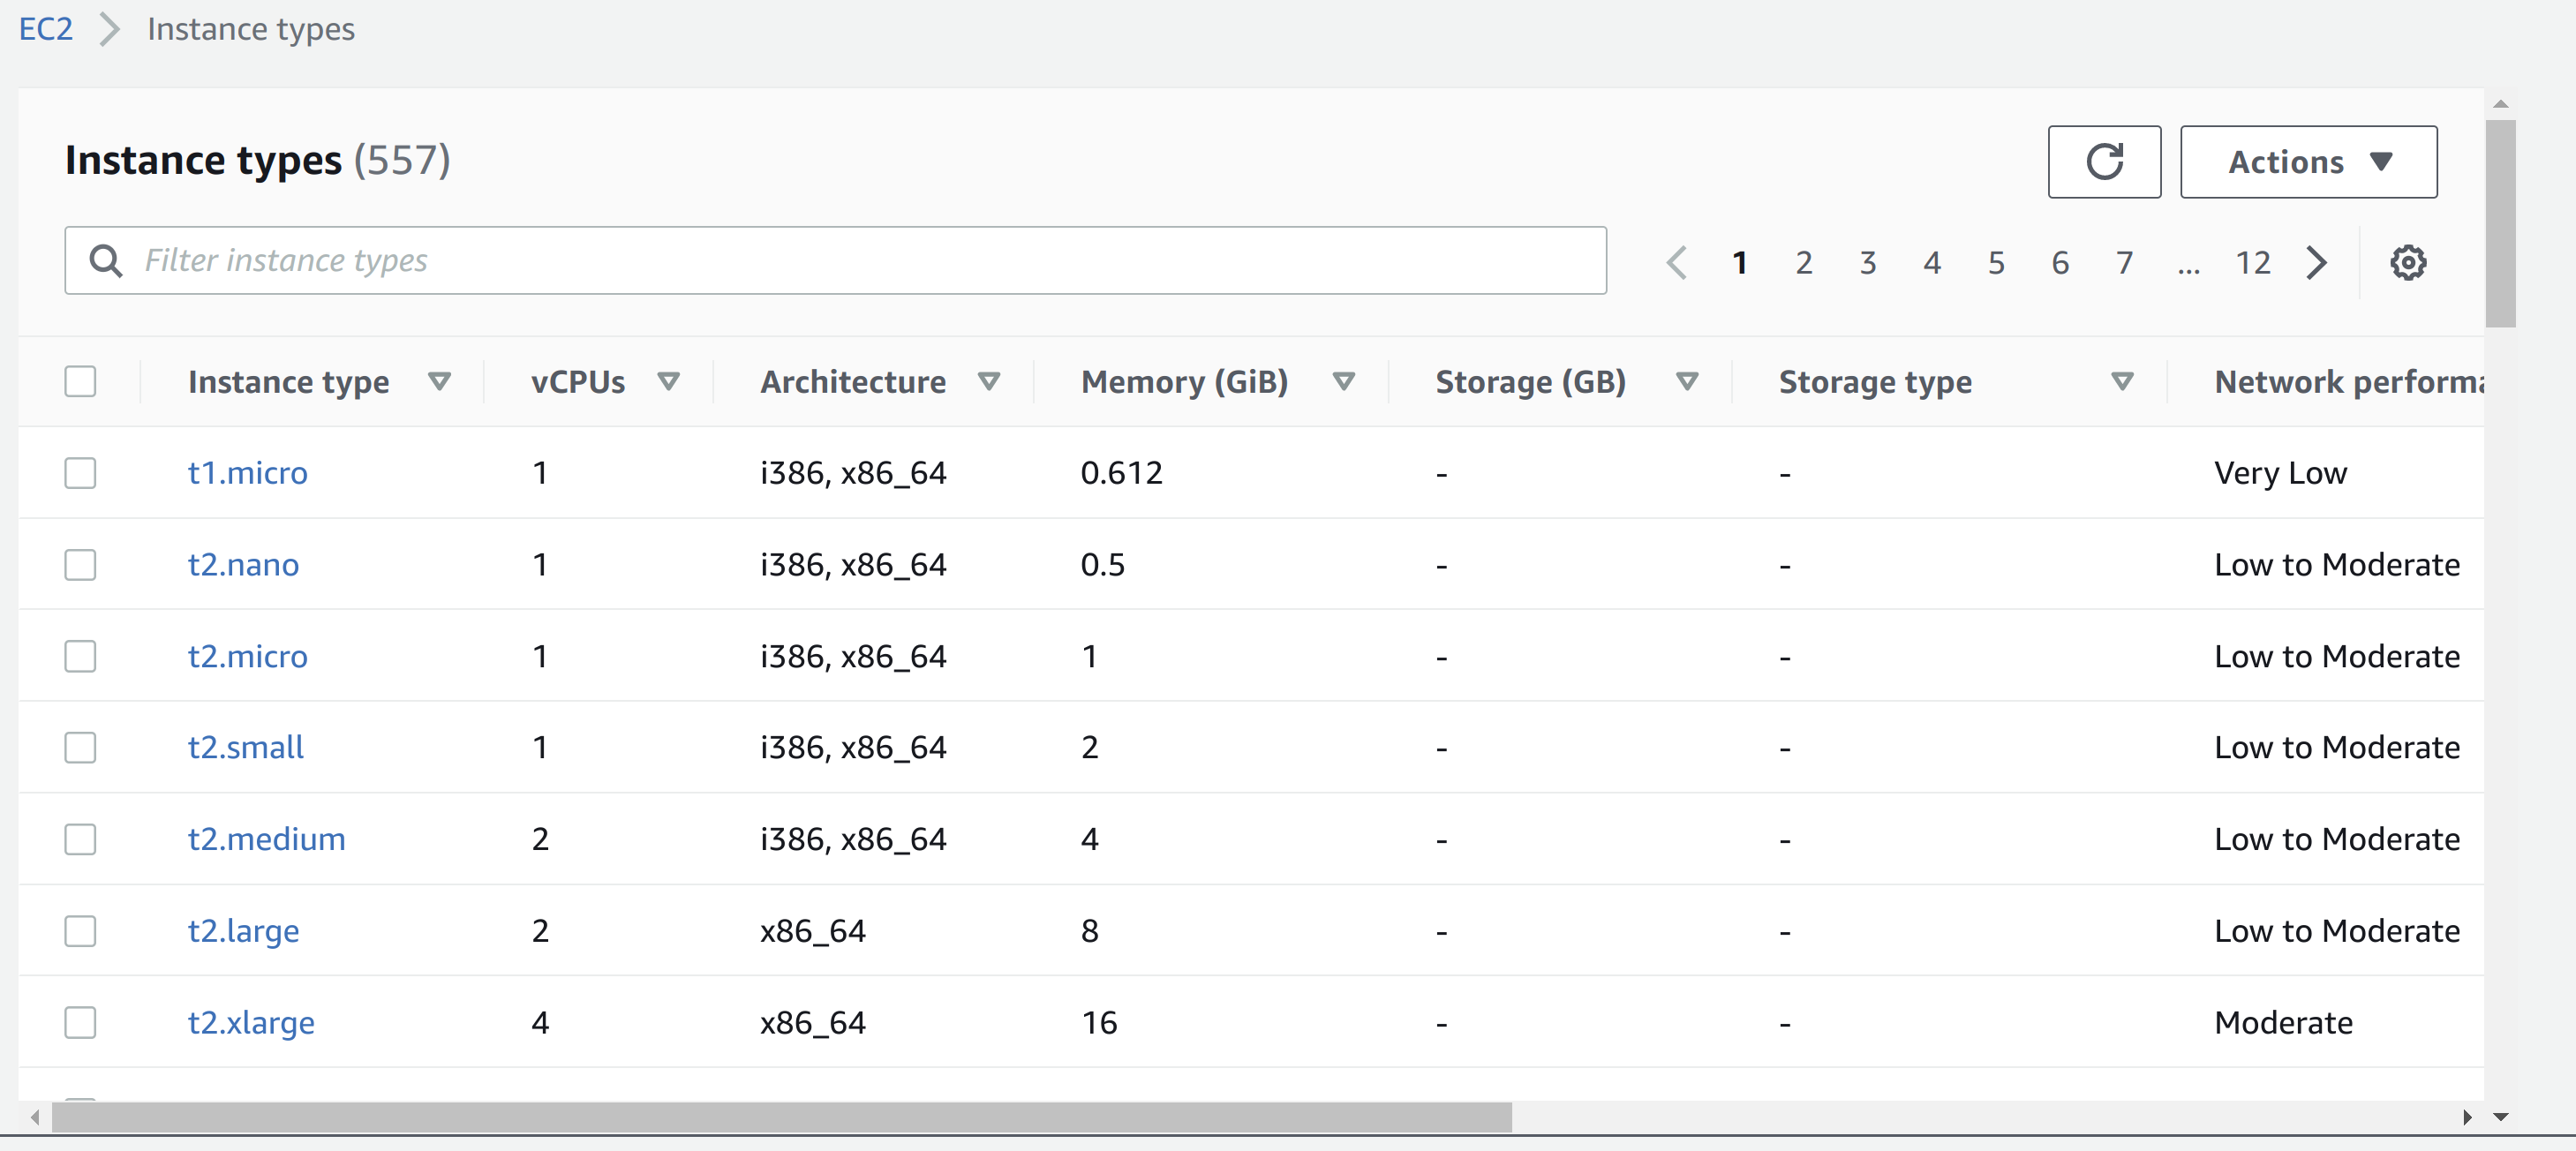
Instance Type
In this section, you can view existing types of instances and their prices.
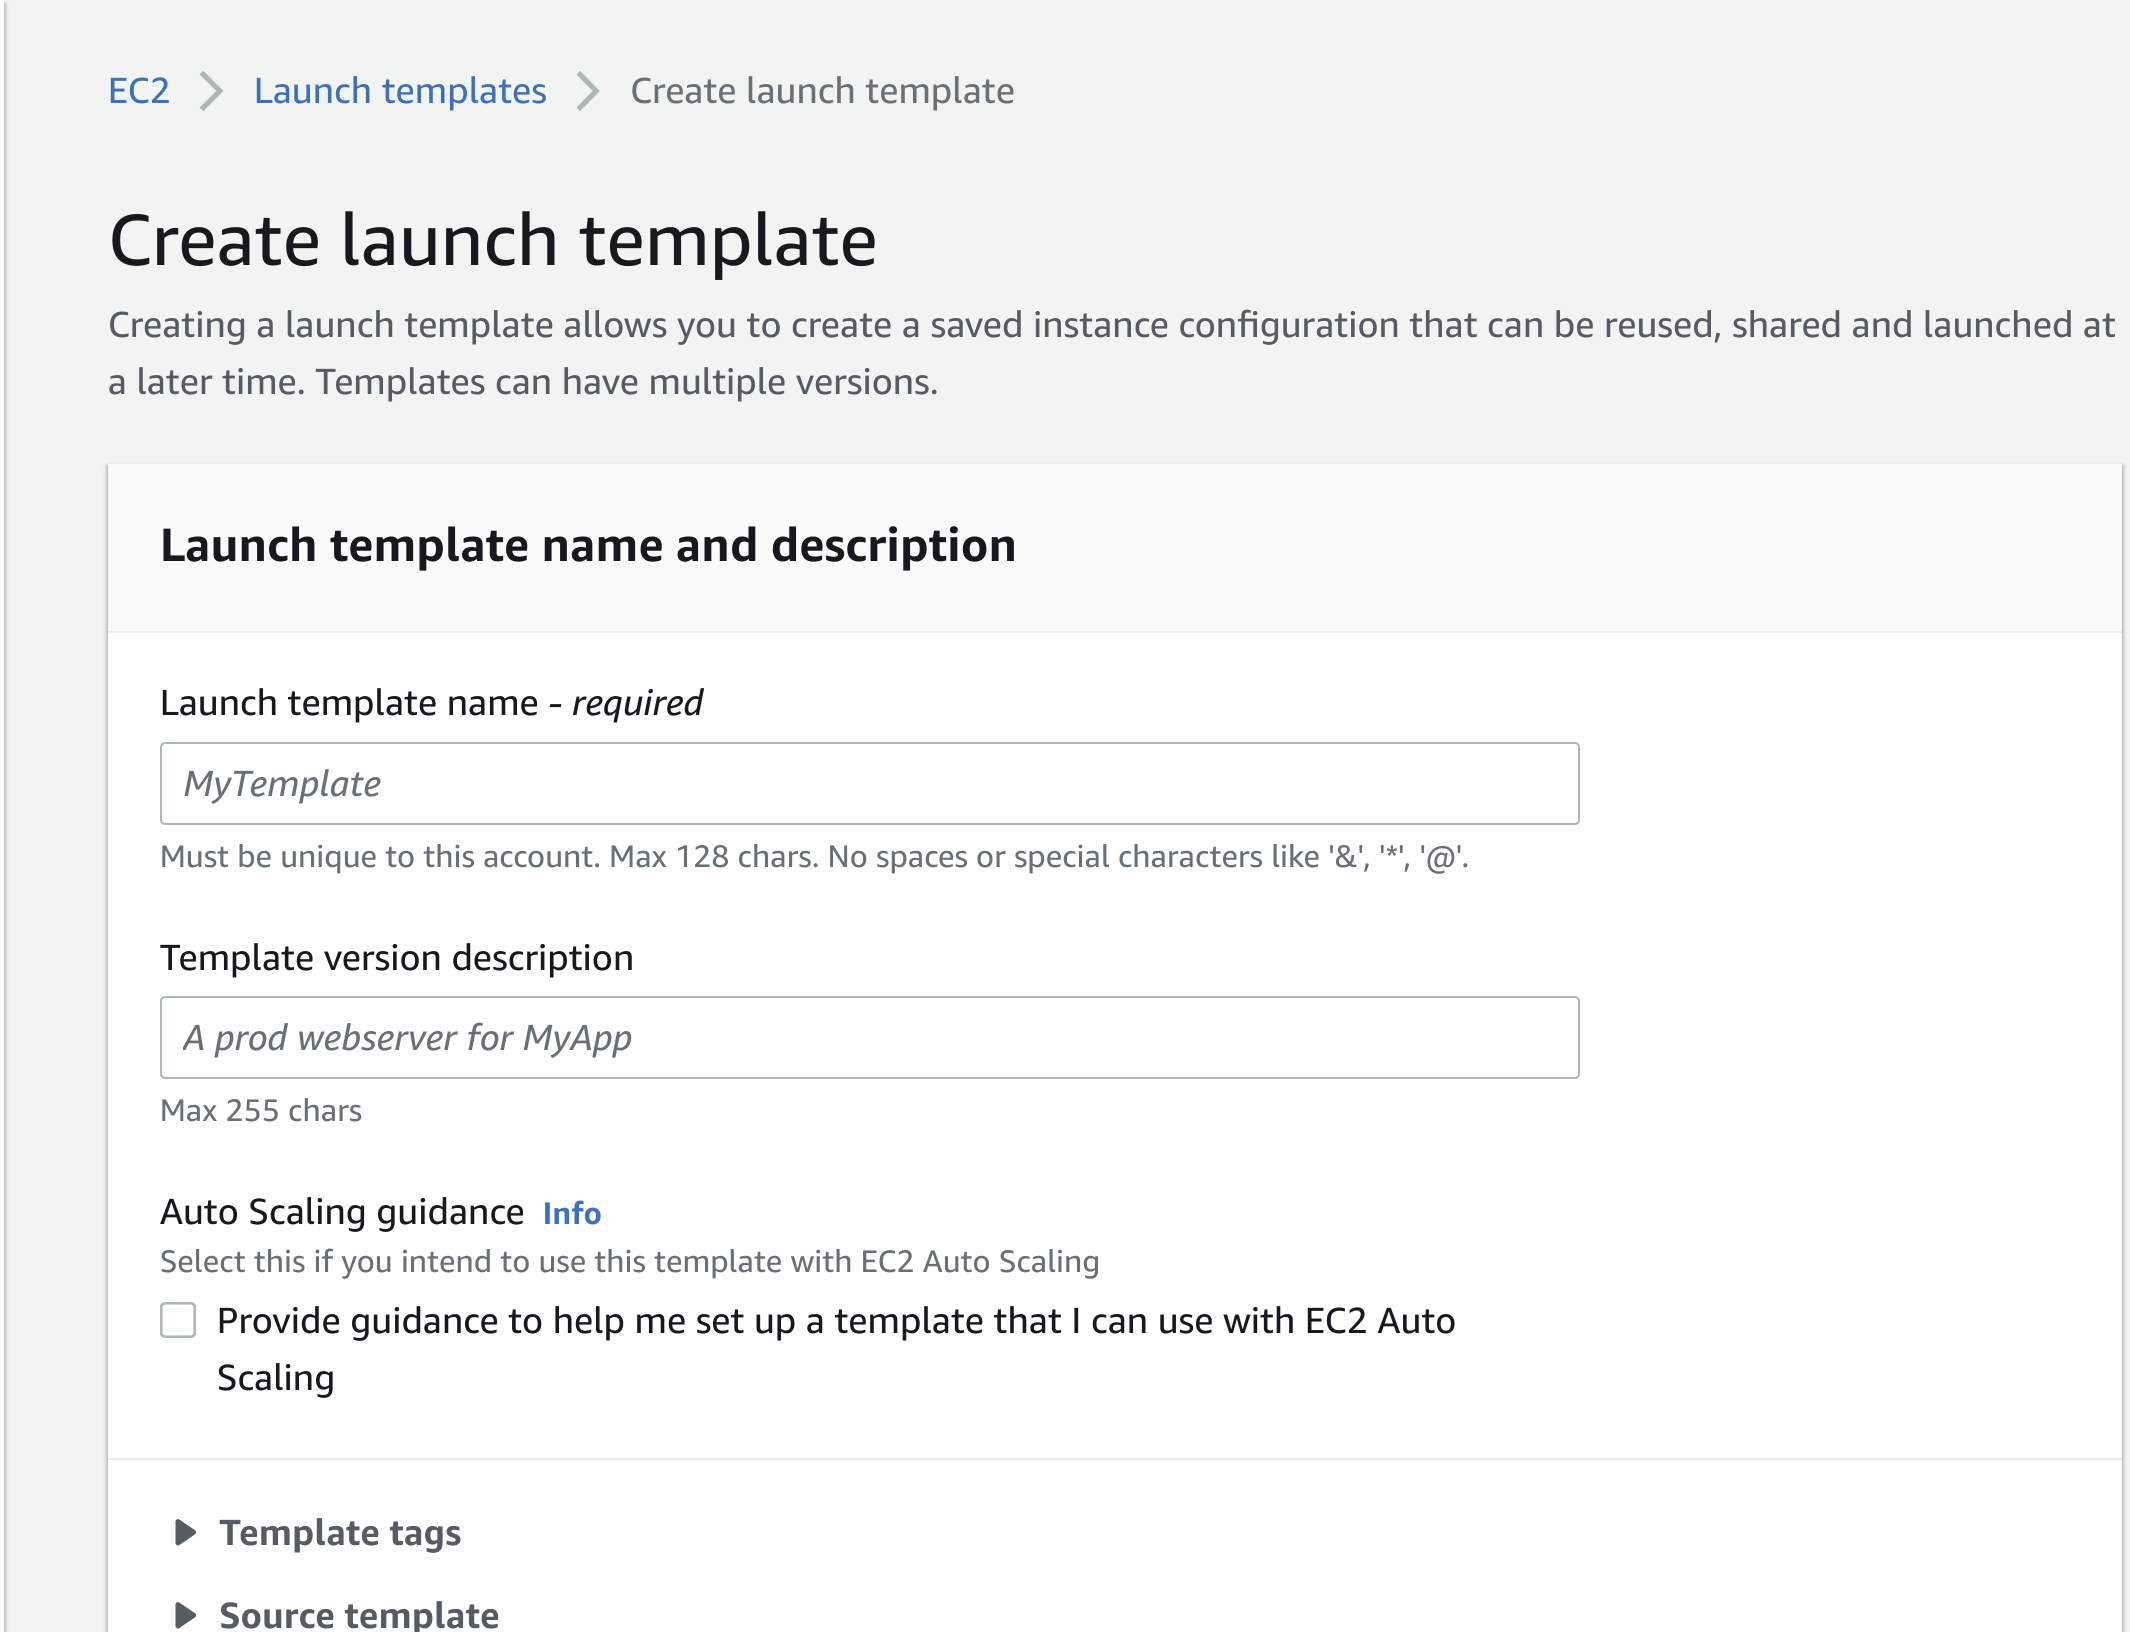
Launch Template
The launch template has almost all the same fields as when creating an instance. But creating a Launch Template does not create an instance, but only creates a template that can be used to create instances with the same configuration. In addition to the standard EC2 parameters, you need to specify the name of the template. Also, a template can be created from an existing instance
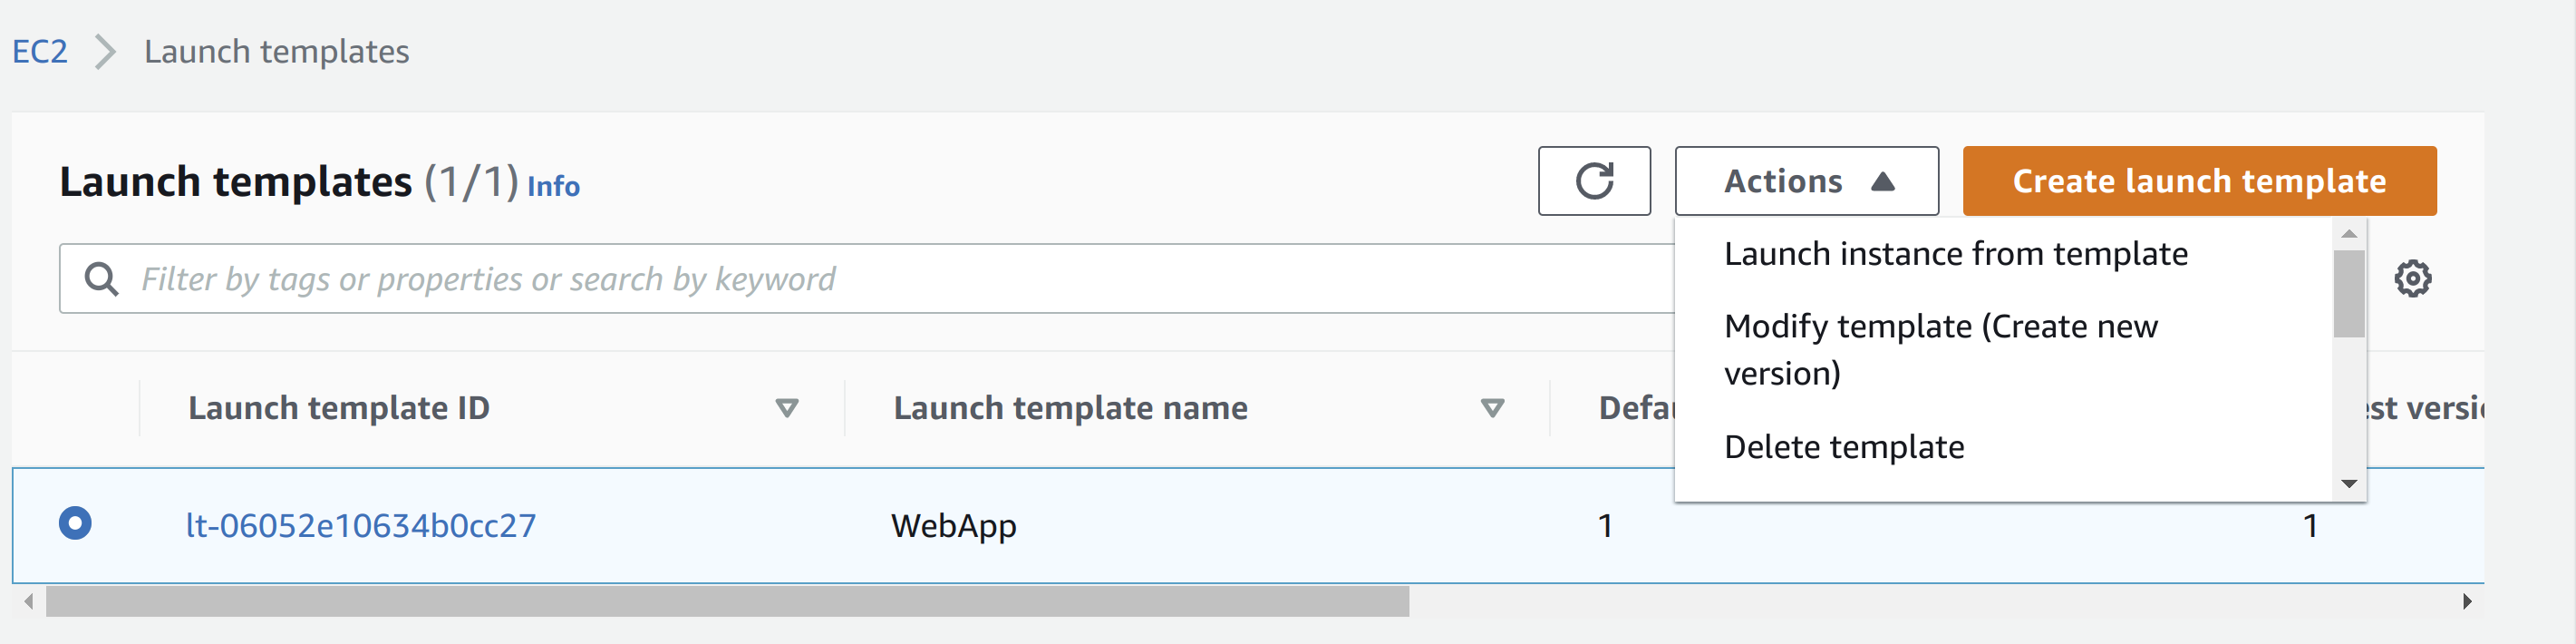
And as soon as the template is created, you can create an instance from it, and you can also use it in an auto-scaling group.
Spot Requests
Spot instances are essentially the sale of available resources at a great discount. At the same time, the instance can be turned off and taken back at any time. When ordering, you make a bid - indicate the maximum price you are willing to pay for use. It is the balance of rates and free resources that forms the final cost, which at the same time differs in different regions.
Savings Plan
Allows you to get a discount on ec2/lambda/fargate for committing to use a certain amount of resources for 1 or 3 years.
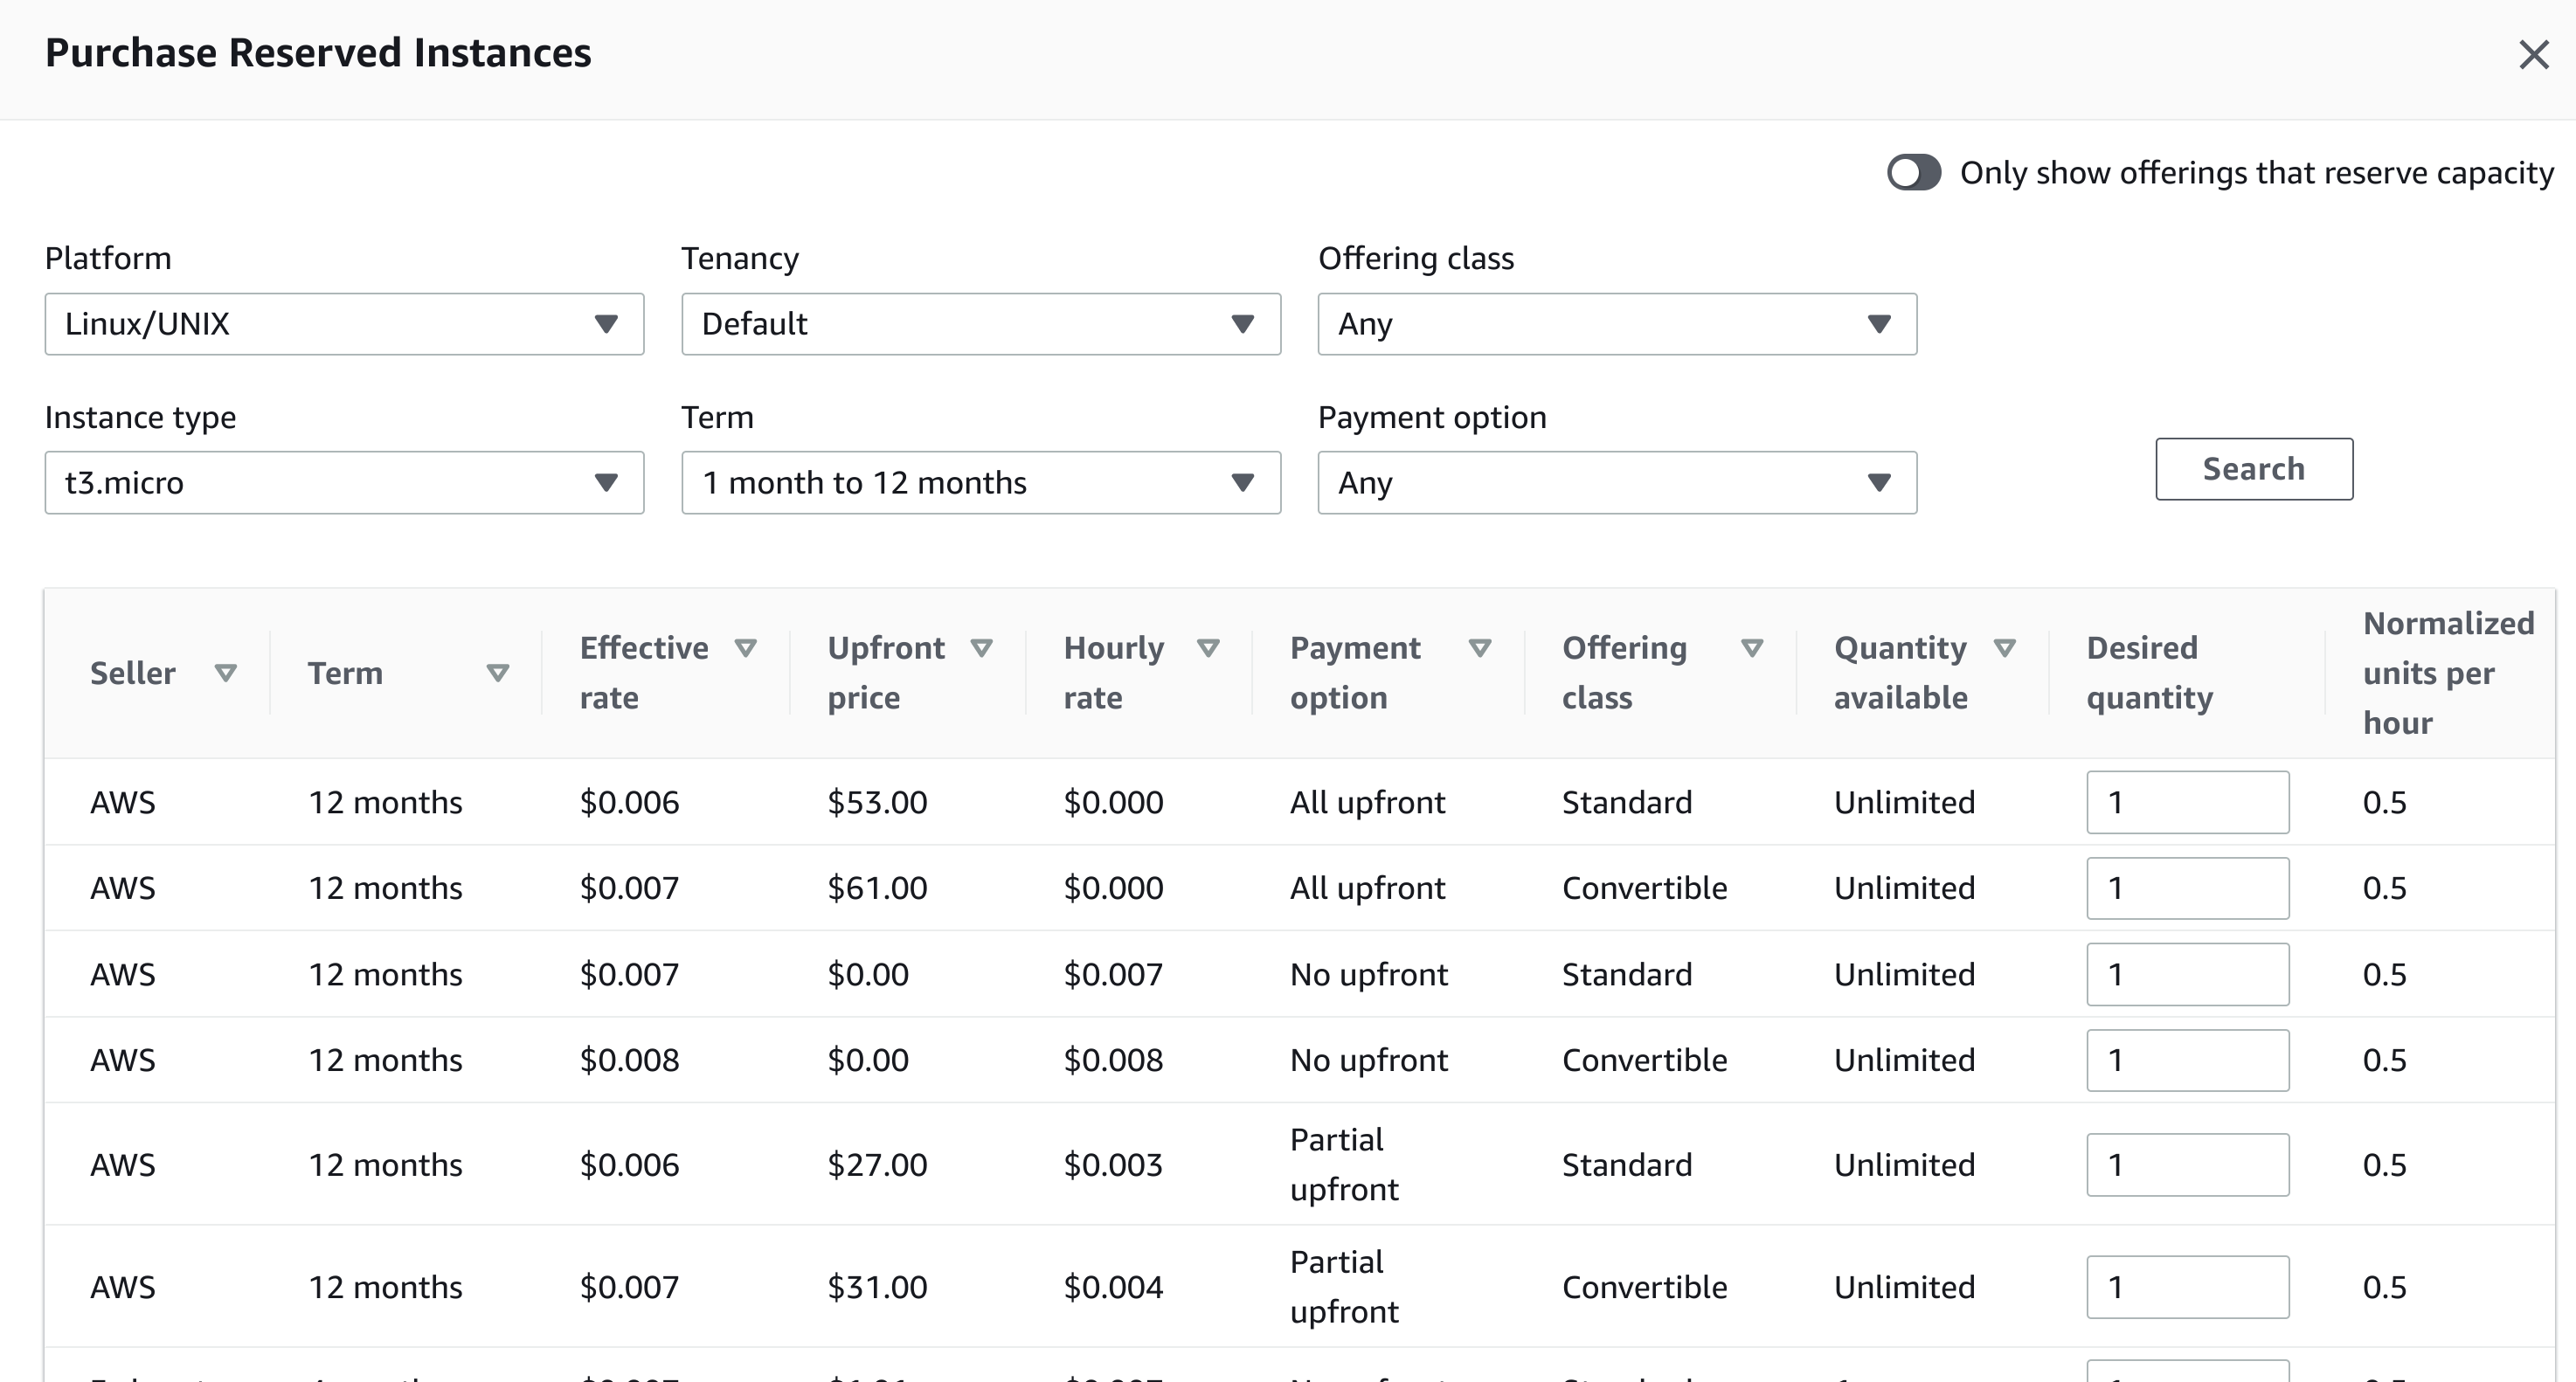
Reserved instances
It is similar to the Savings Plan with the only difference that a reserved instance is purchased for a specific type of instance for 1 or 3 years
Images
Images have an AMI Catalog where you can find all publicly available ami. The AMIs section contains all of our created AMIs. AMI can be created by right-clicking on the instance, in the menu that appears, and selecting Image and Templates -> Create Image.
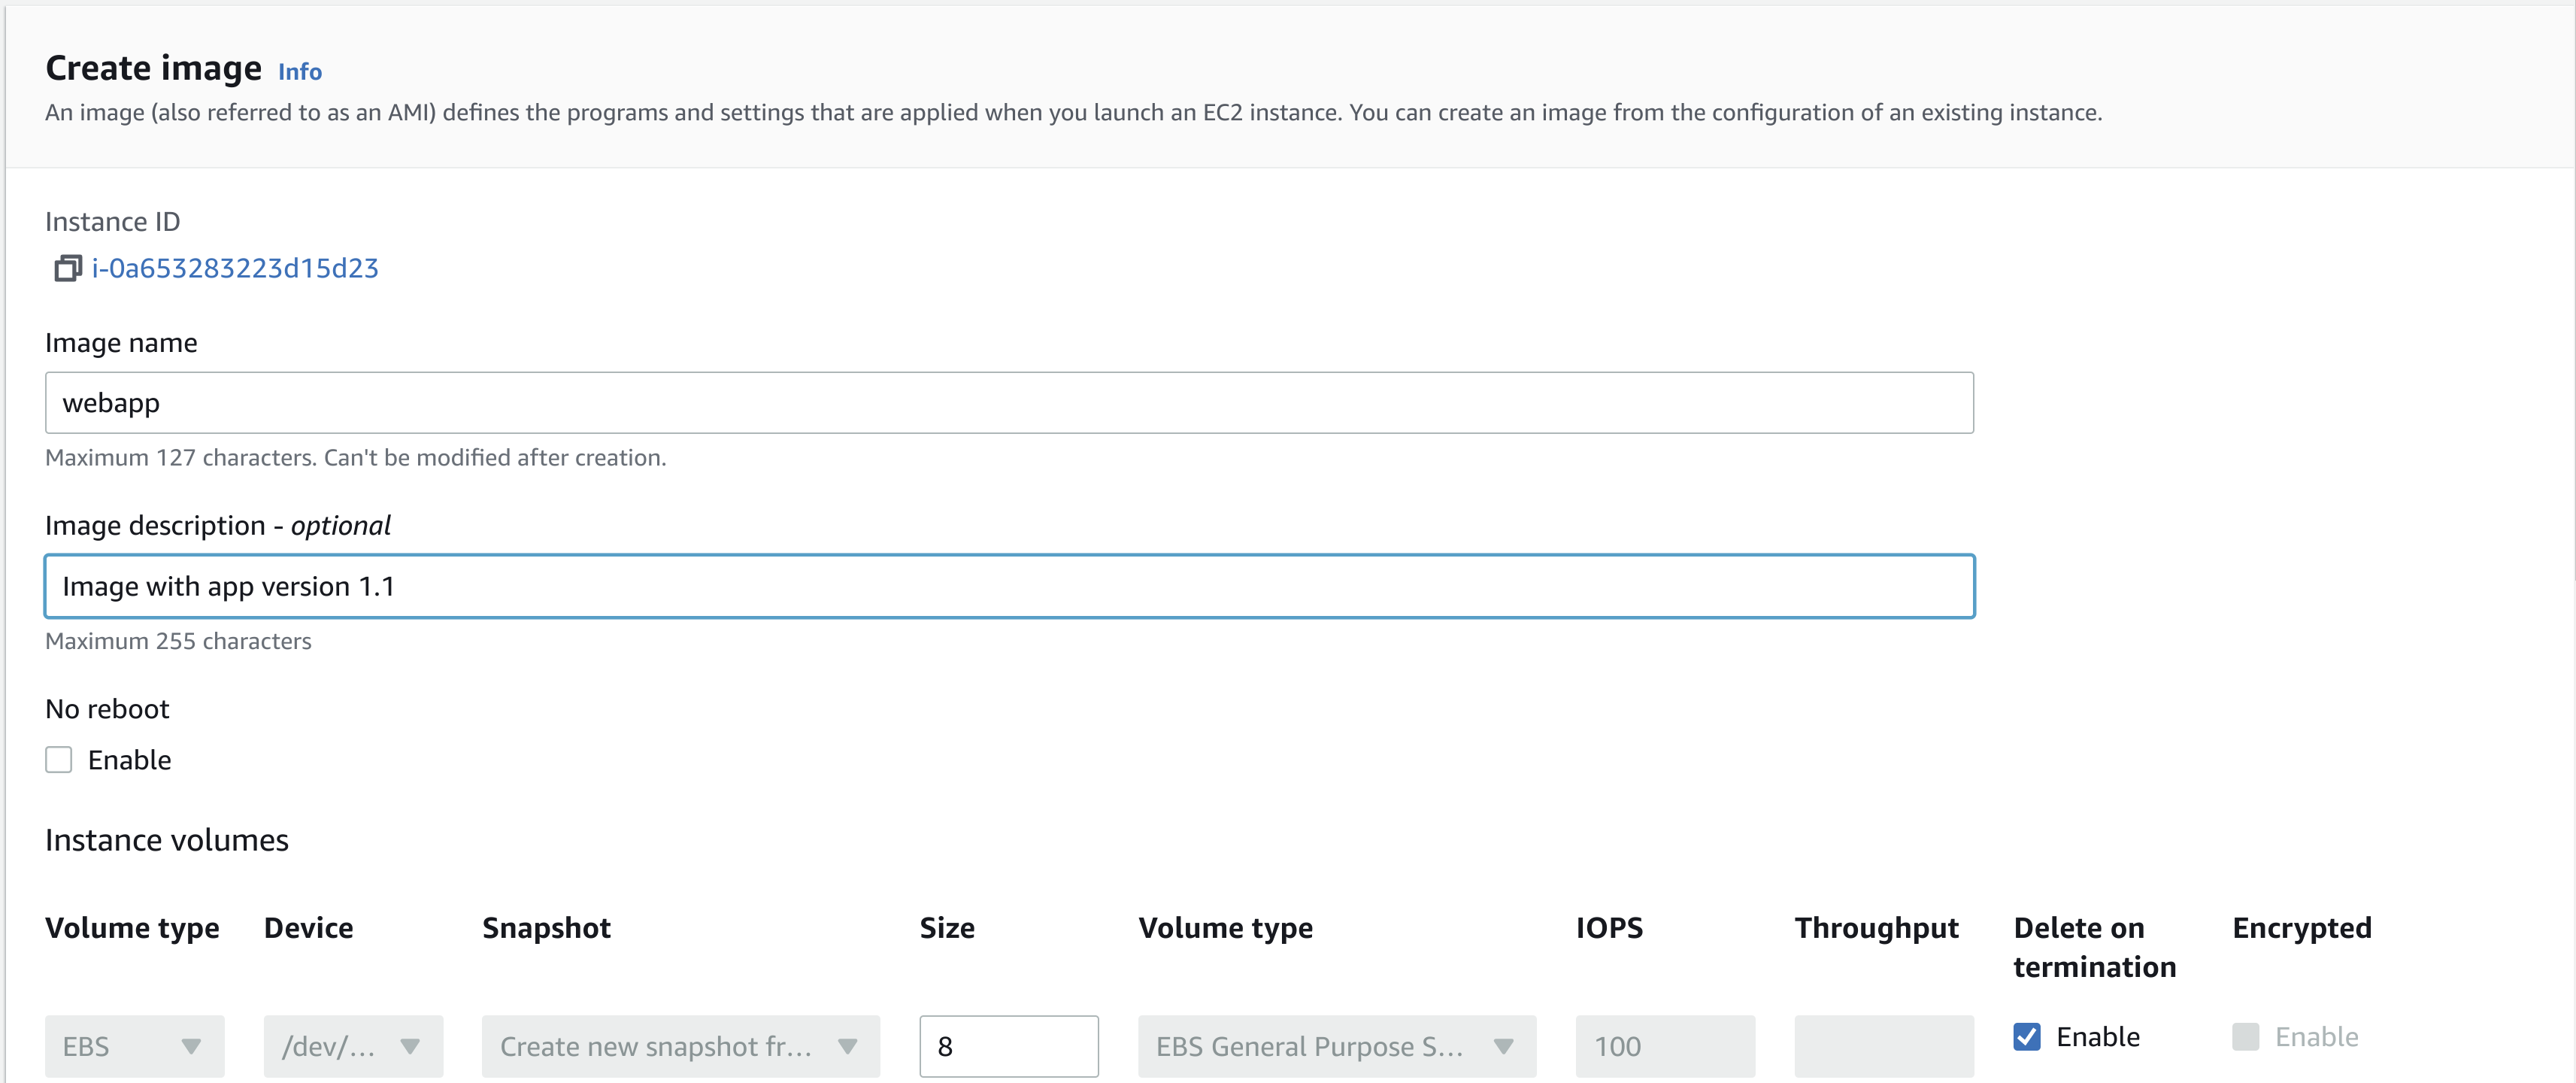
Once all the information is entered, click Create Image and you can found in the AMIs section
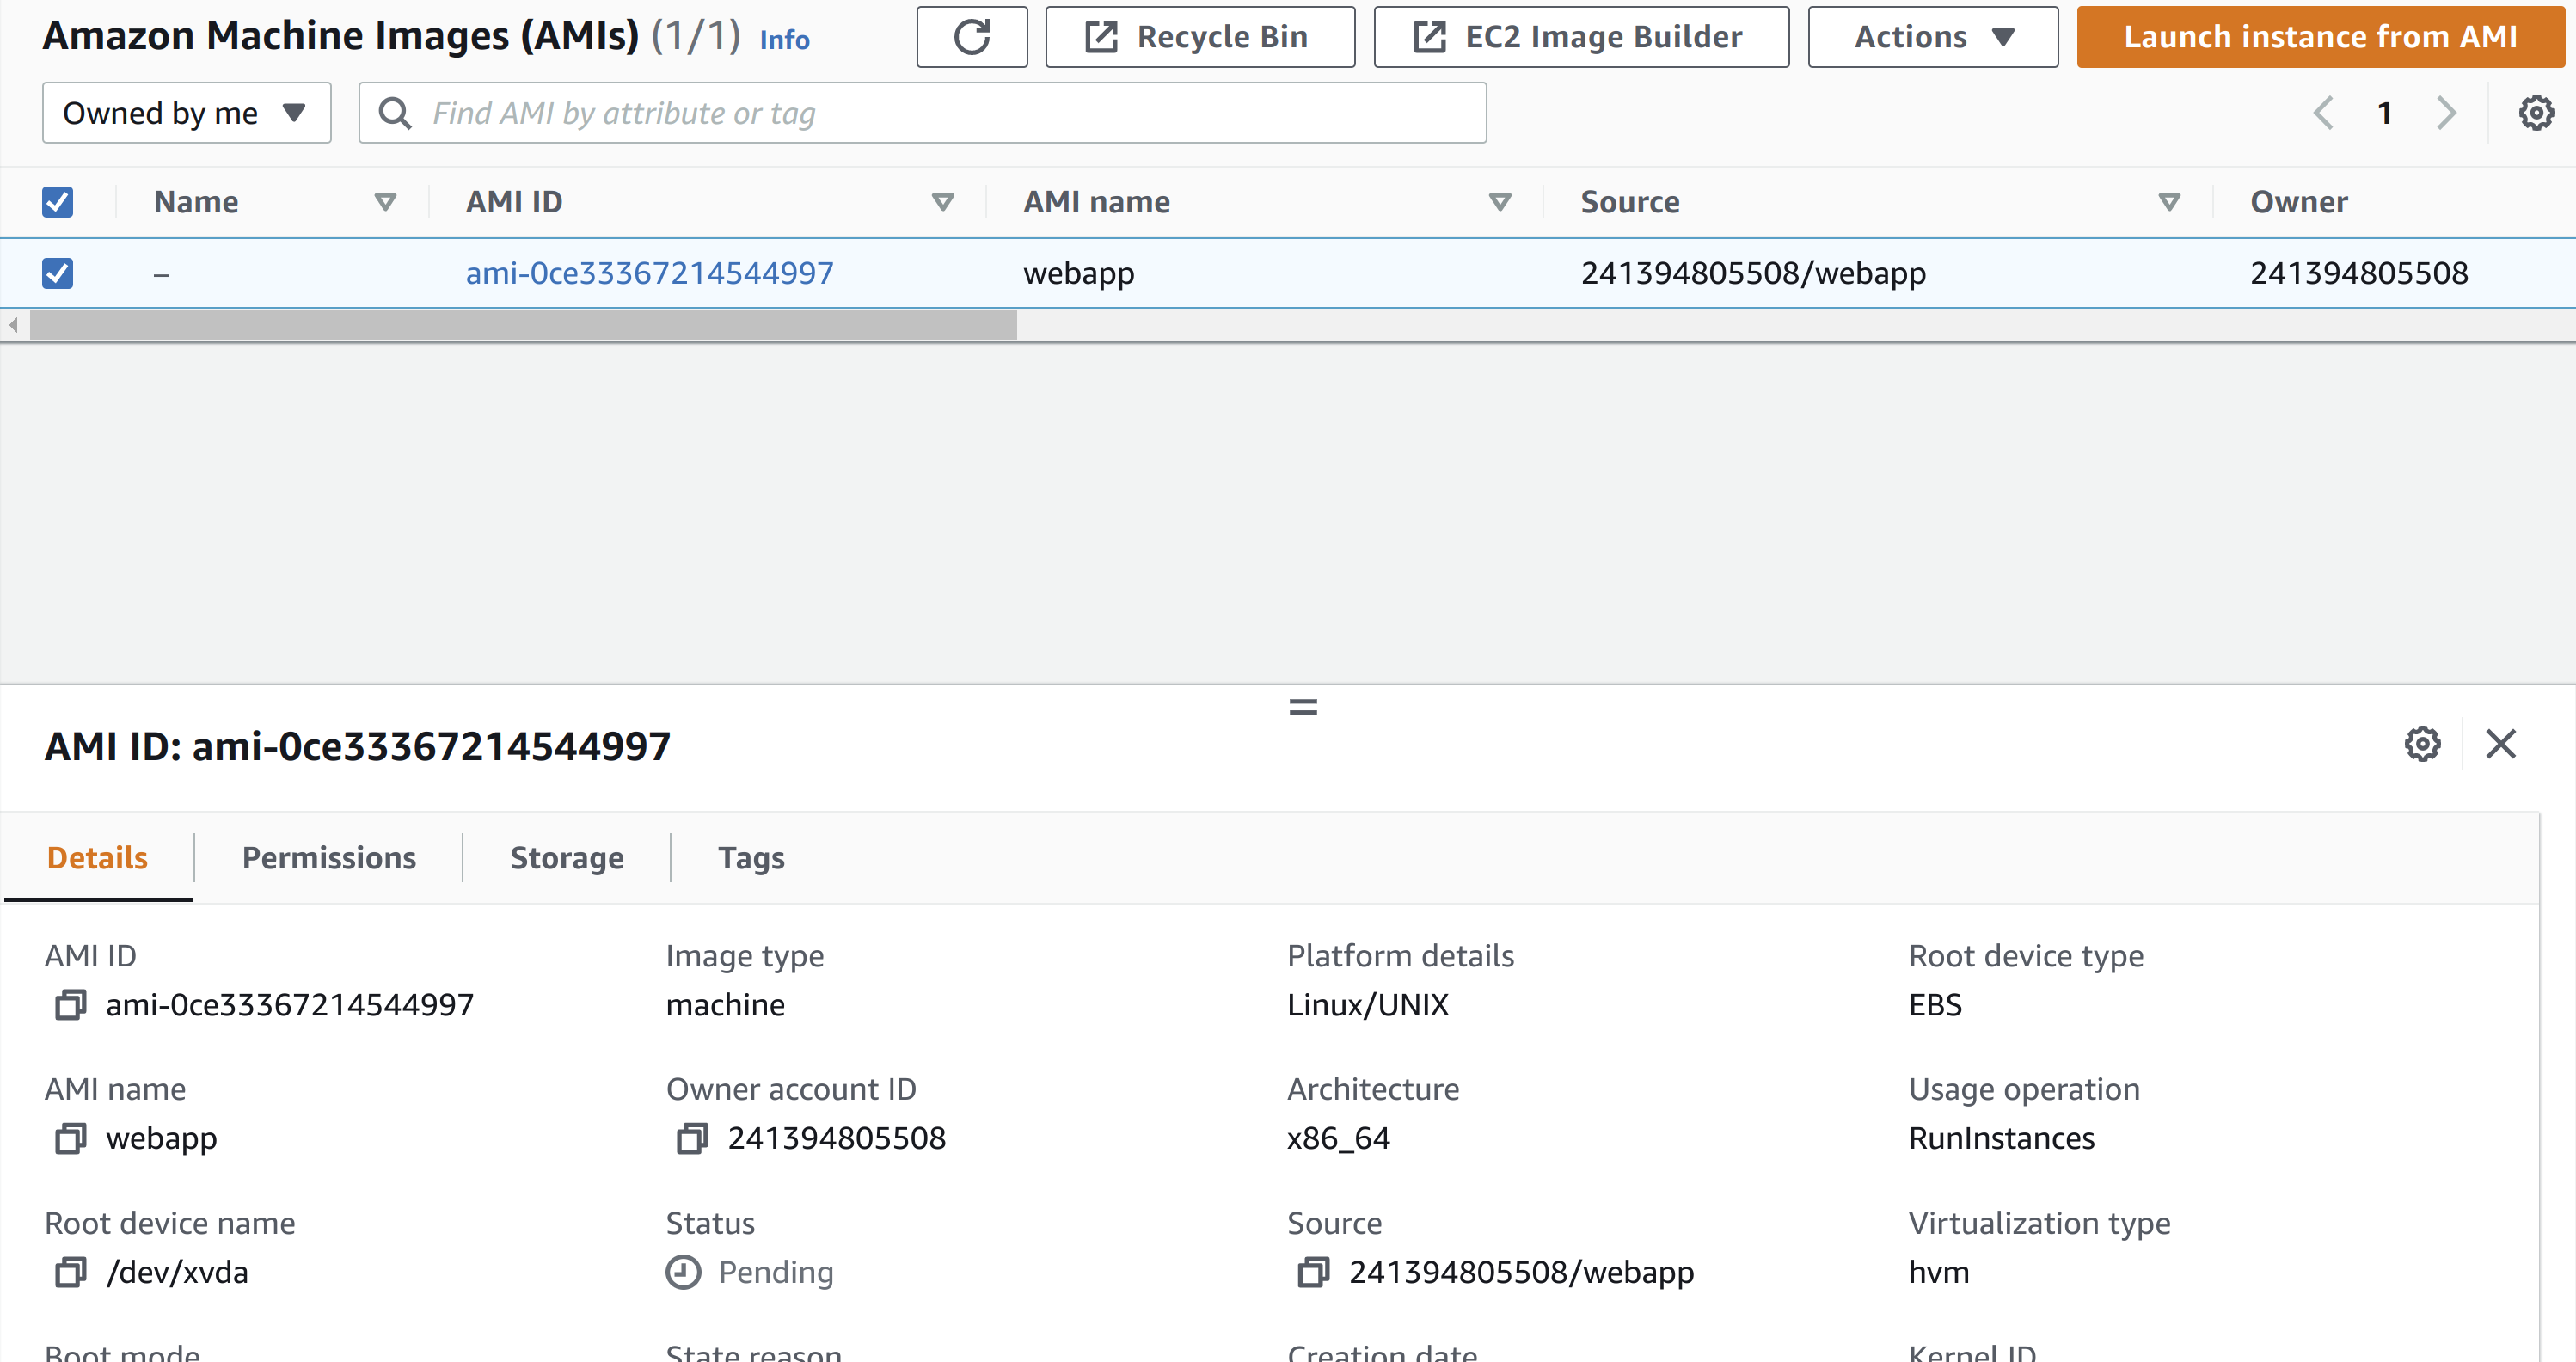
Now you can create new instances from this AMI
Elastic Block Store
This section stores everything related to disks.
Volumes
Some disks are currently used by the instance or that are temporarily not used by anything. From here disk can be deleted, detached, resized, or mounted.

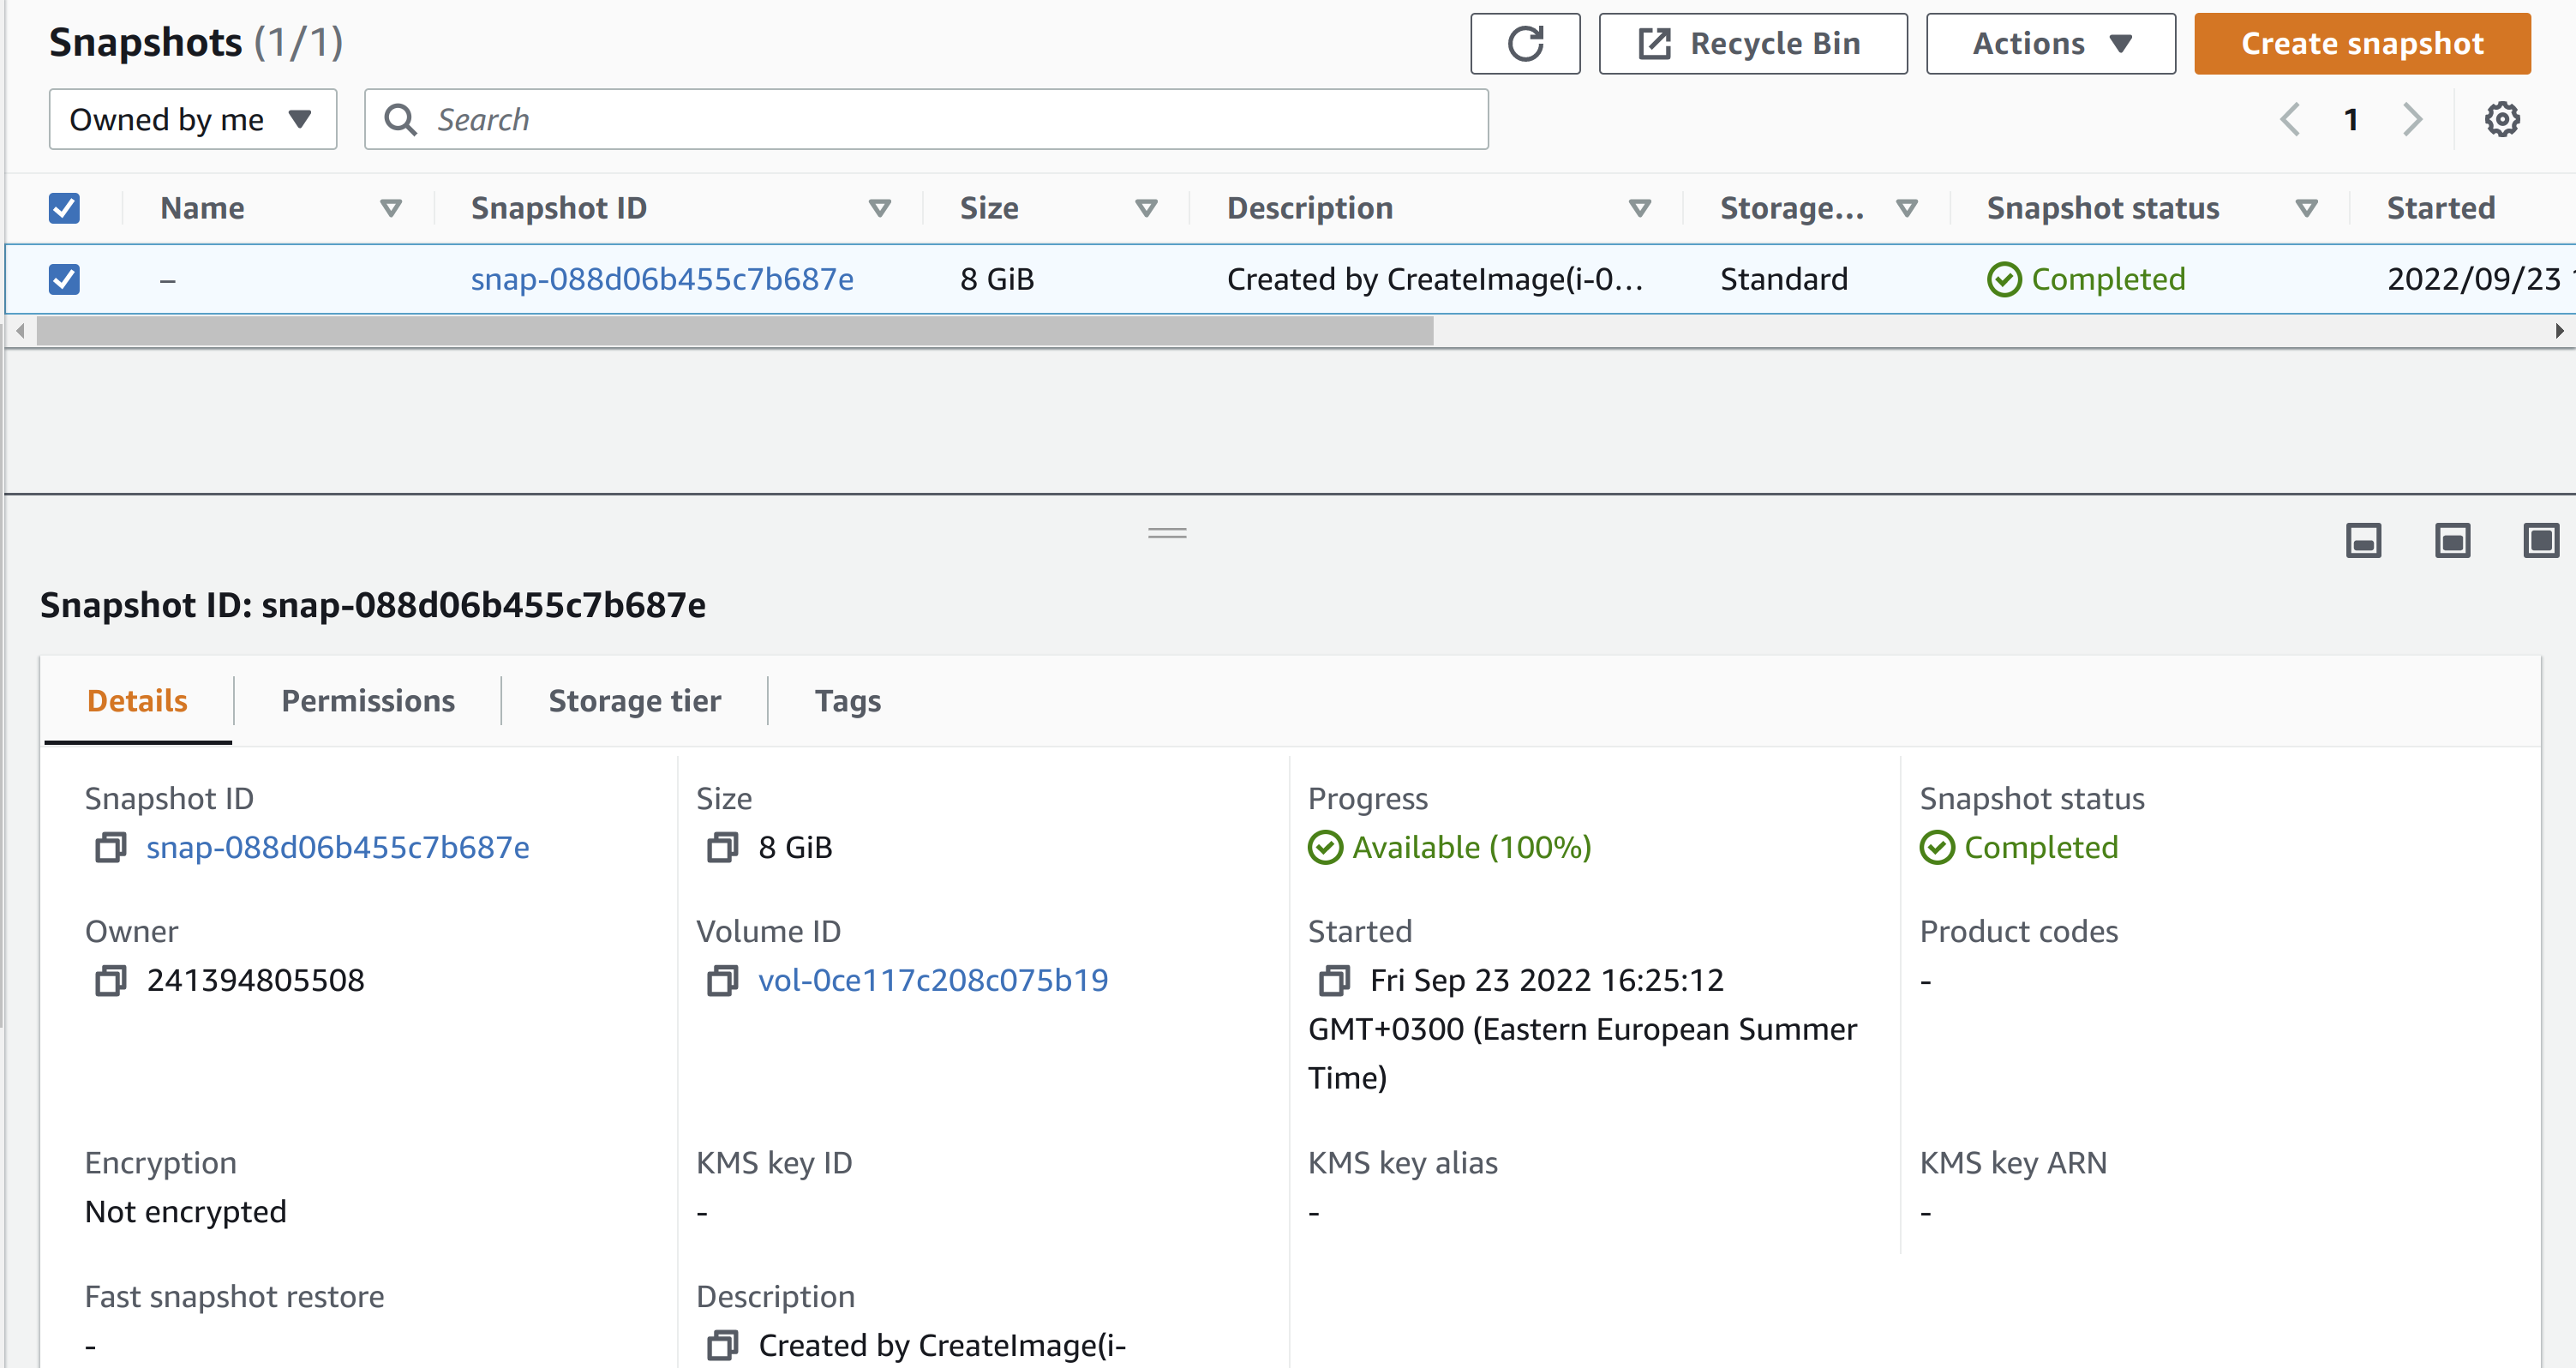
Snapshots
This section contains snapshots of the disk at a certain point in time. With their help, you can create a new volume if you need to restore data that was lost on the disk itself. Note that when we created the AMI, a disk image was automatically created. And it won’t be able to be removed as long as the AMI exists. First, you need to delete ami and only then you can delete the picture
Lifecycle Manager
Allows you to create rules according to which disk snapshot/ami will be automatically created and deleted.
On the first page of the configuration, you need to specify the name of the policy and also select the IAM role that will be used to create/delete AMIs and snapshots. To select an instance that will be used in the policy you need to specify the tag of this instance. For example, if I have a tag on my servers as type = database, then I can specify that tag, and the policy will be applied only to this instance.
On the next page, you need to define the schedule on which snapshots/AMIs will be created and how many snapshots/AMIs to keep. For example, run every day at 12-00 UTC and save the last 20.
Network & Security
In this section, there are security groups that control the configuration of access to ports on the instance. SSH keys and static IP are also located here.
Security Groups
Security Groups allow you to open specific ports to access the instance. For example, you can open port 443 for HTTPS access, or port 22 for ssh access.
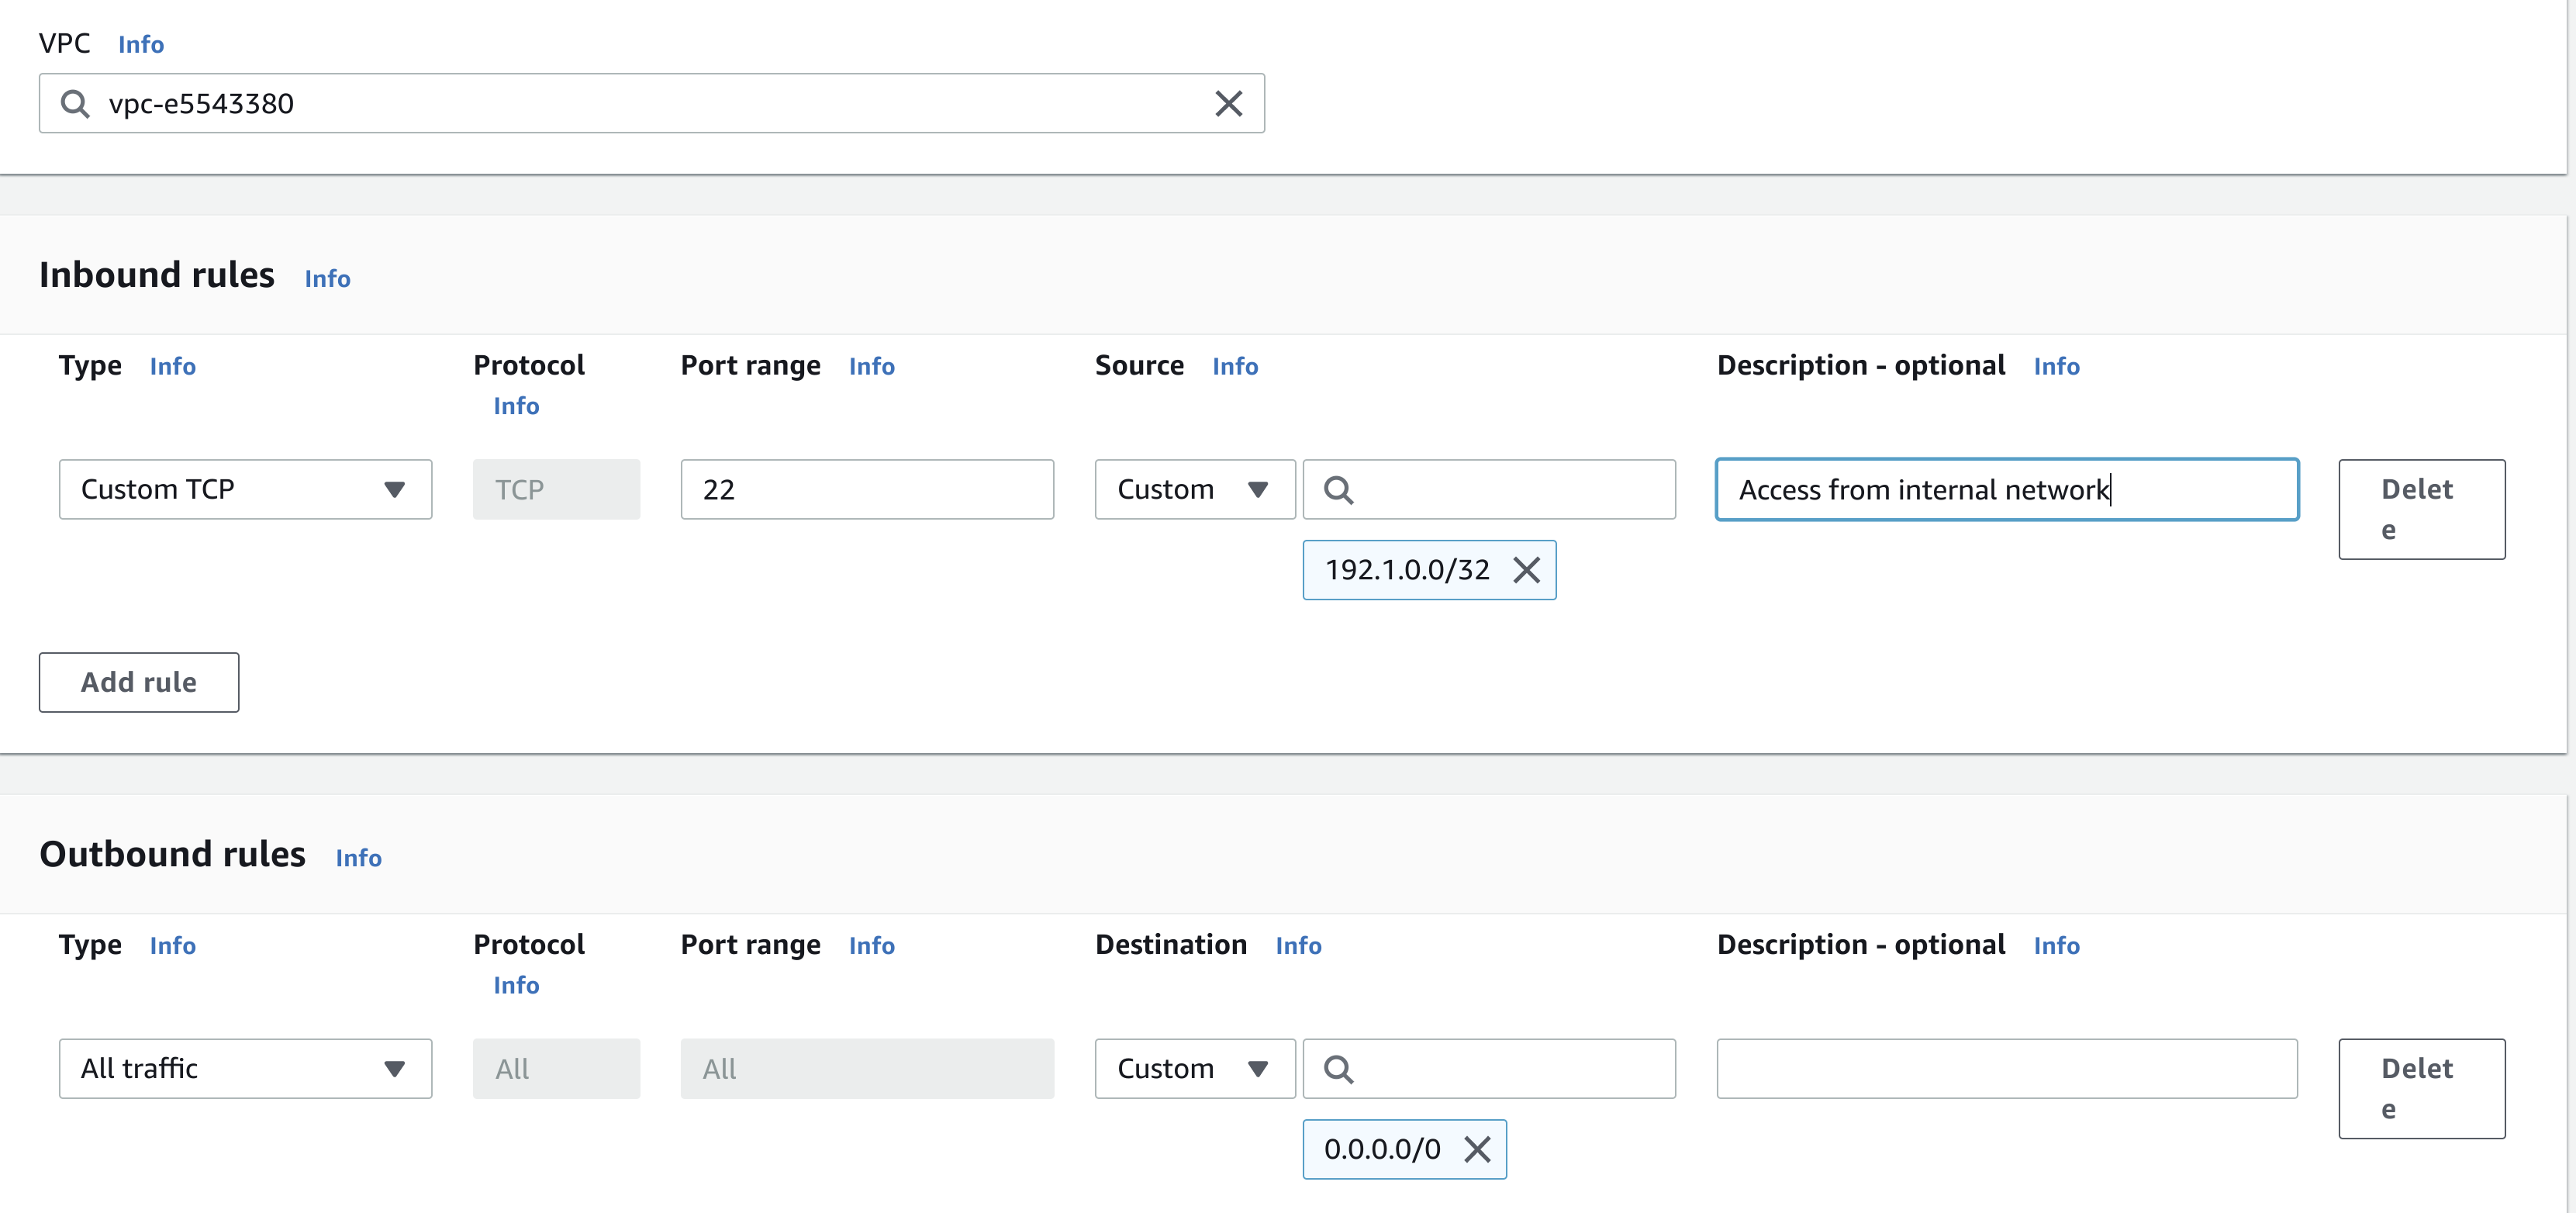
The are two types of rules: Inbound and Outbound, which control incoming and outgoing traffic. In this example, there will be one rule in the incoming traffic that allows access to port 22 from a certain IP address. All outgoing traffic is available. Without any restrictions.
The security group can be selected when creating the instance, or right-click on the existing instance and select Security > Change security groups. Select/delete the desired group and press Save.
Elastic IPs
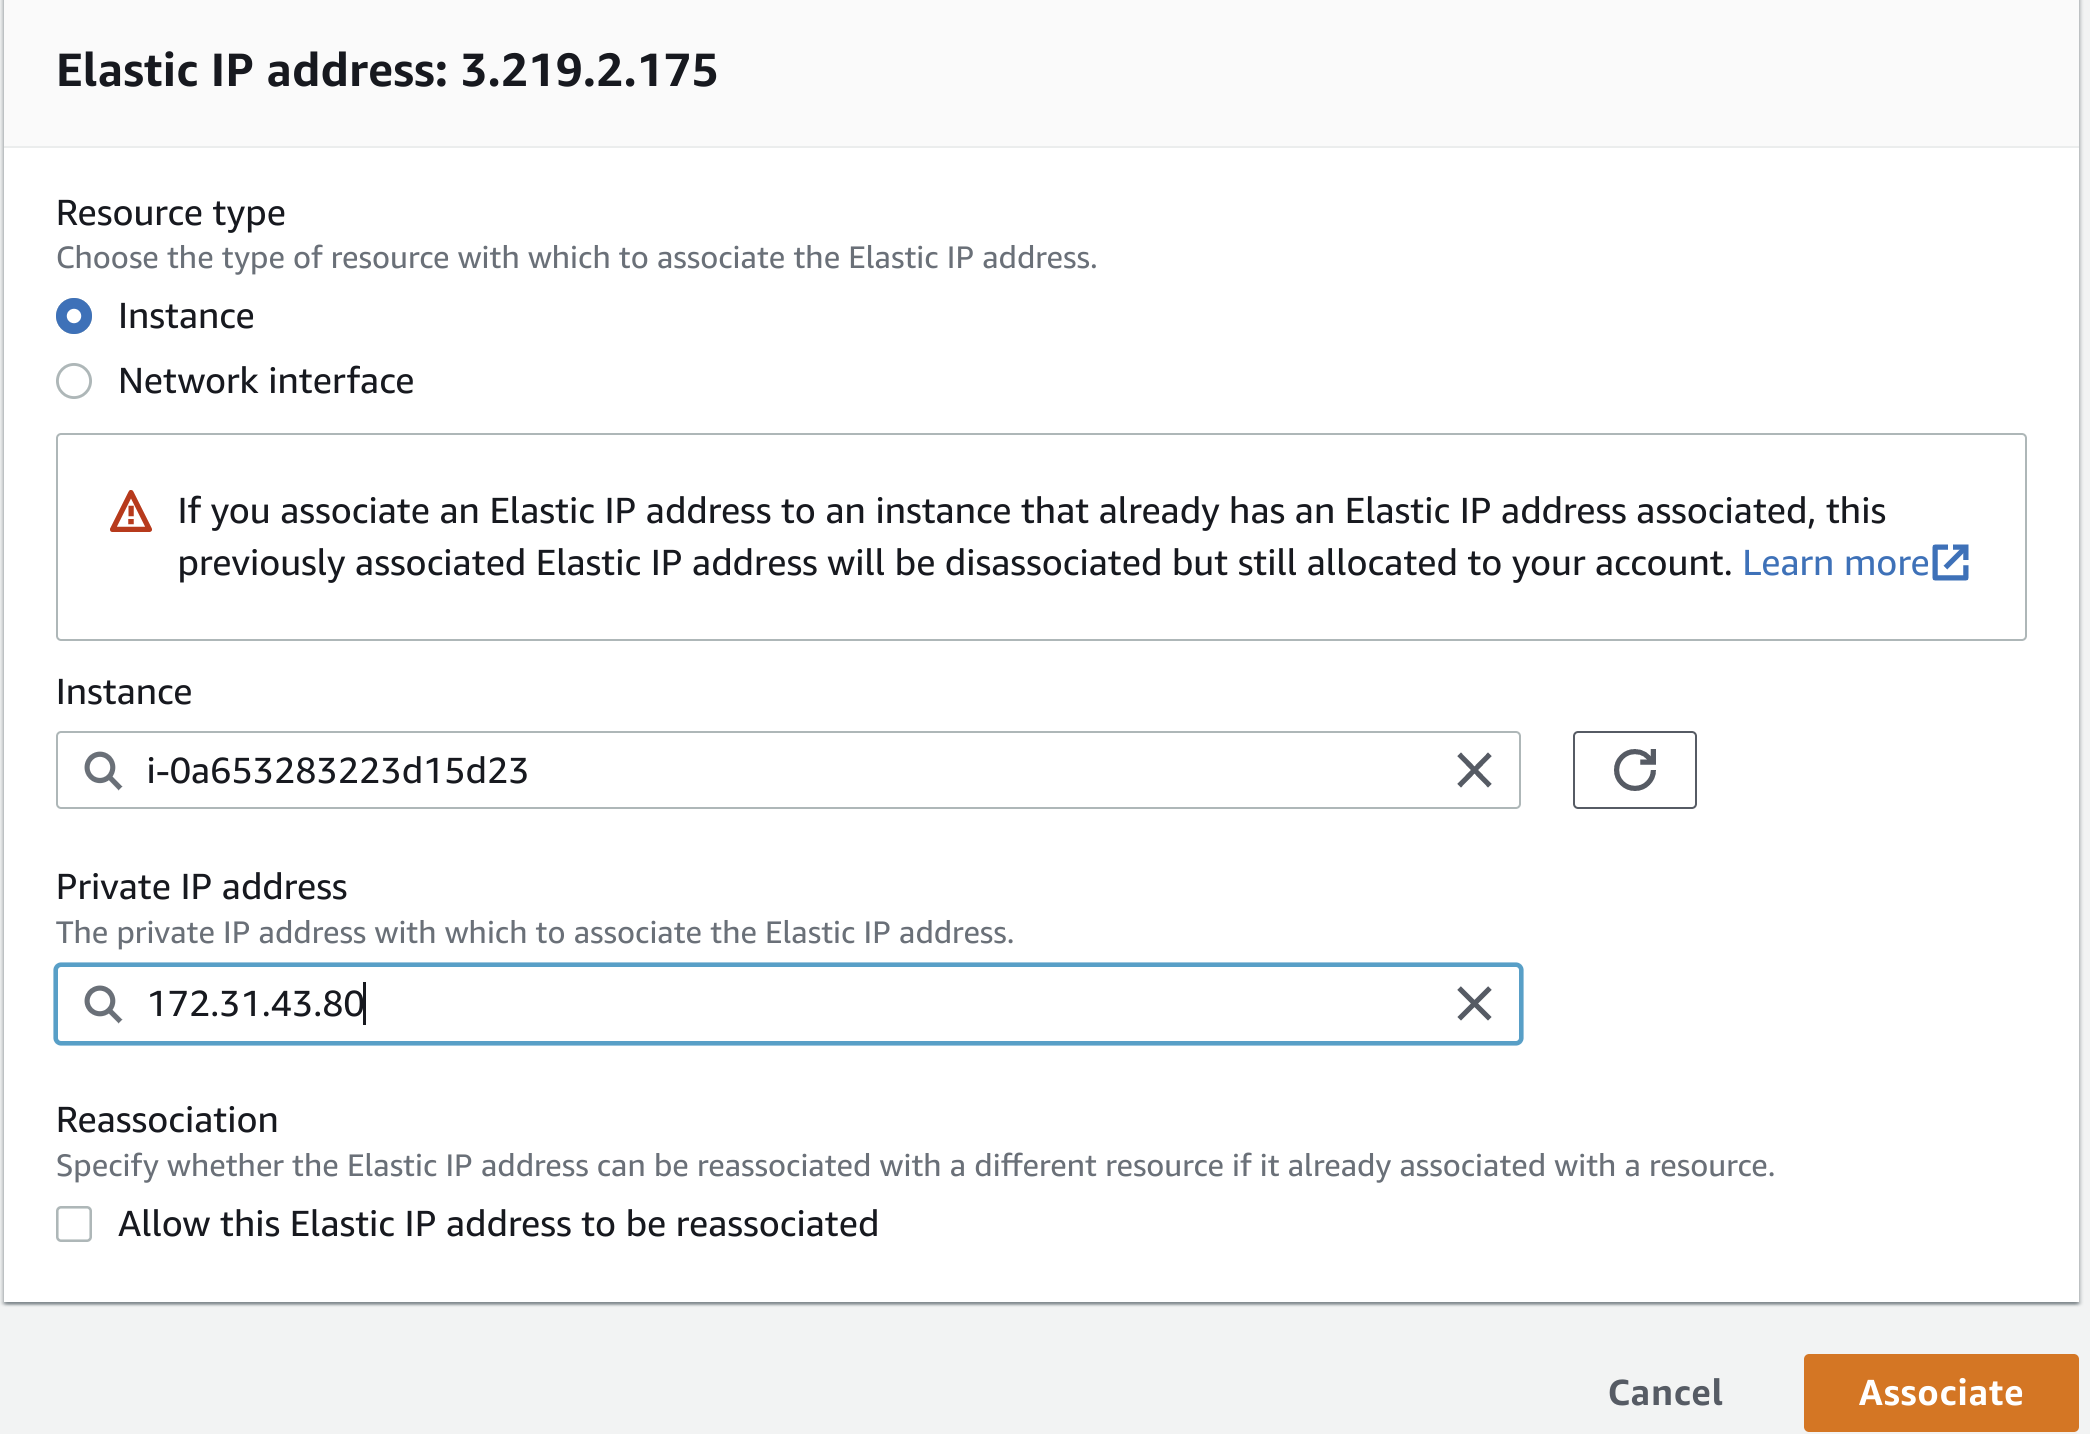
Allows you to reserve a static public IP address. If an instance in AWS is removed or stopped, its public IP address changes. If we need it to always be the same, it can be done in this section. Just click on Allocate Elastic IP Address

Now you need to tell the instance to use this address. To do this, you need to select the IP address and click Actions -> Associate Elastic IP address in the menu. Select the instance and its private IP and click Associate.
If the IP is no longer needed, it can be deleted by clicking Actions -> Release Elastic IP address and confirming the deletion.
Placement groups
When you start a new instance, AWS tries to place it so that all instances are distributed on the same hardware to minimize correlated failures
Key Pairs
Public parts of SSH keys are stored in Key Pairs. They can be selected when creating an instance. A new public key can also be uploaded here
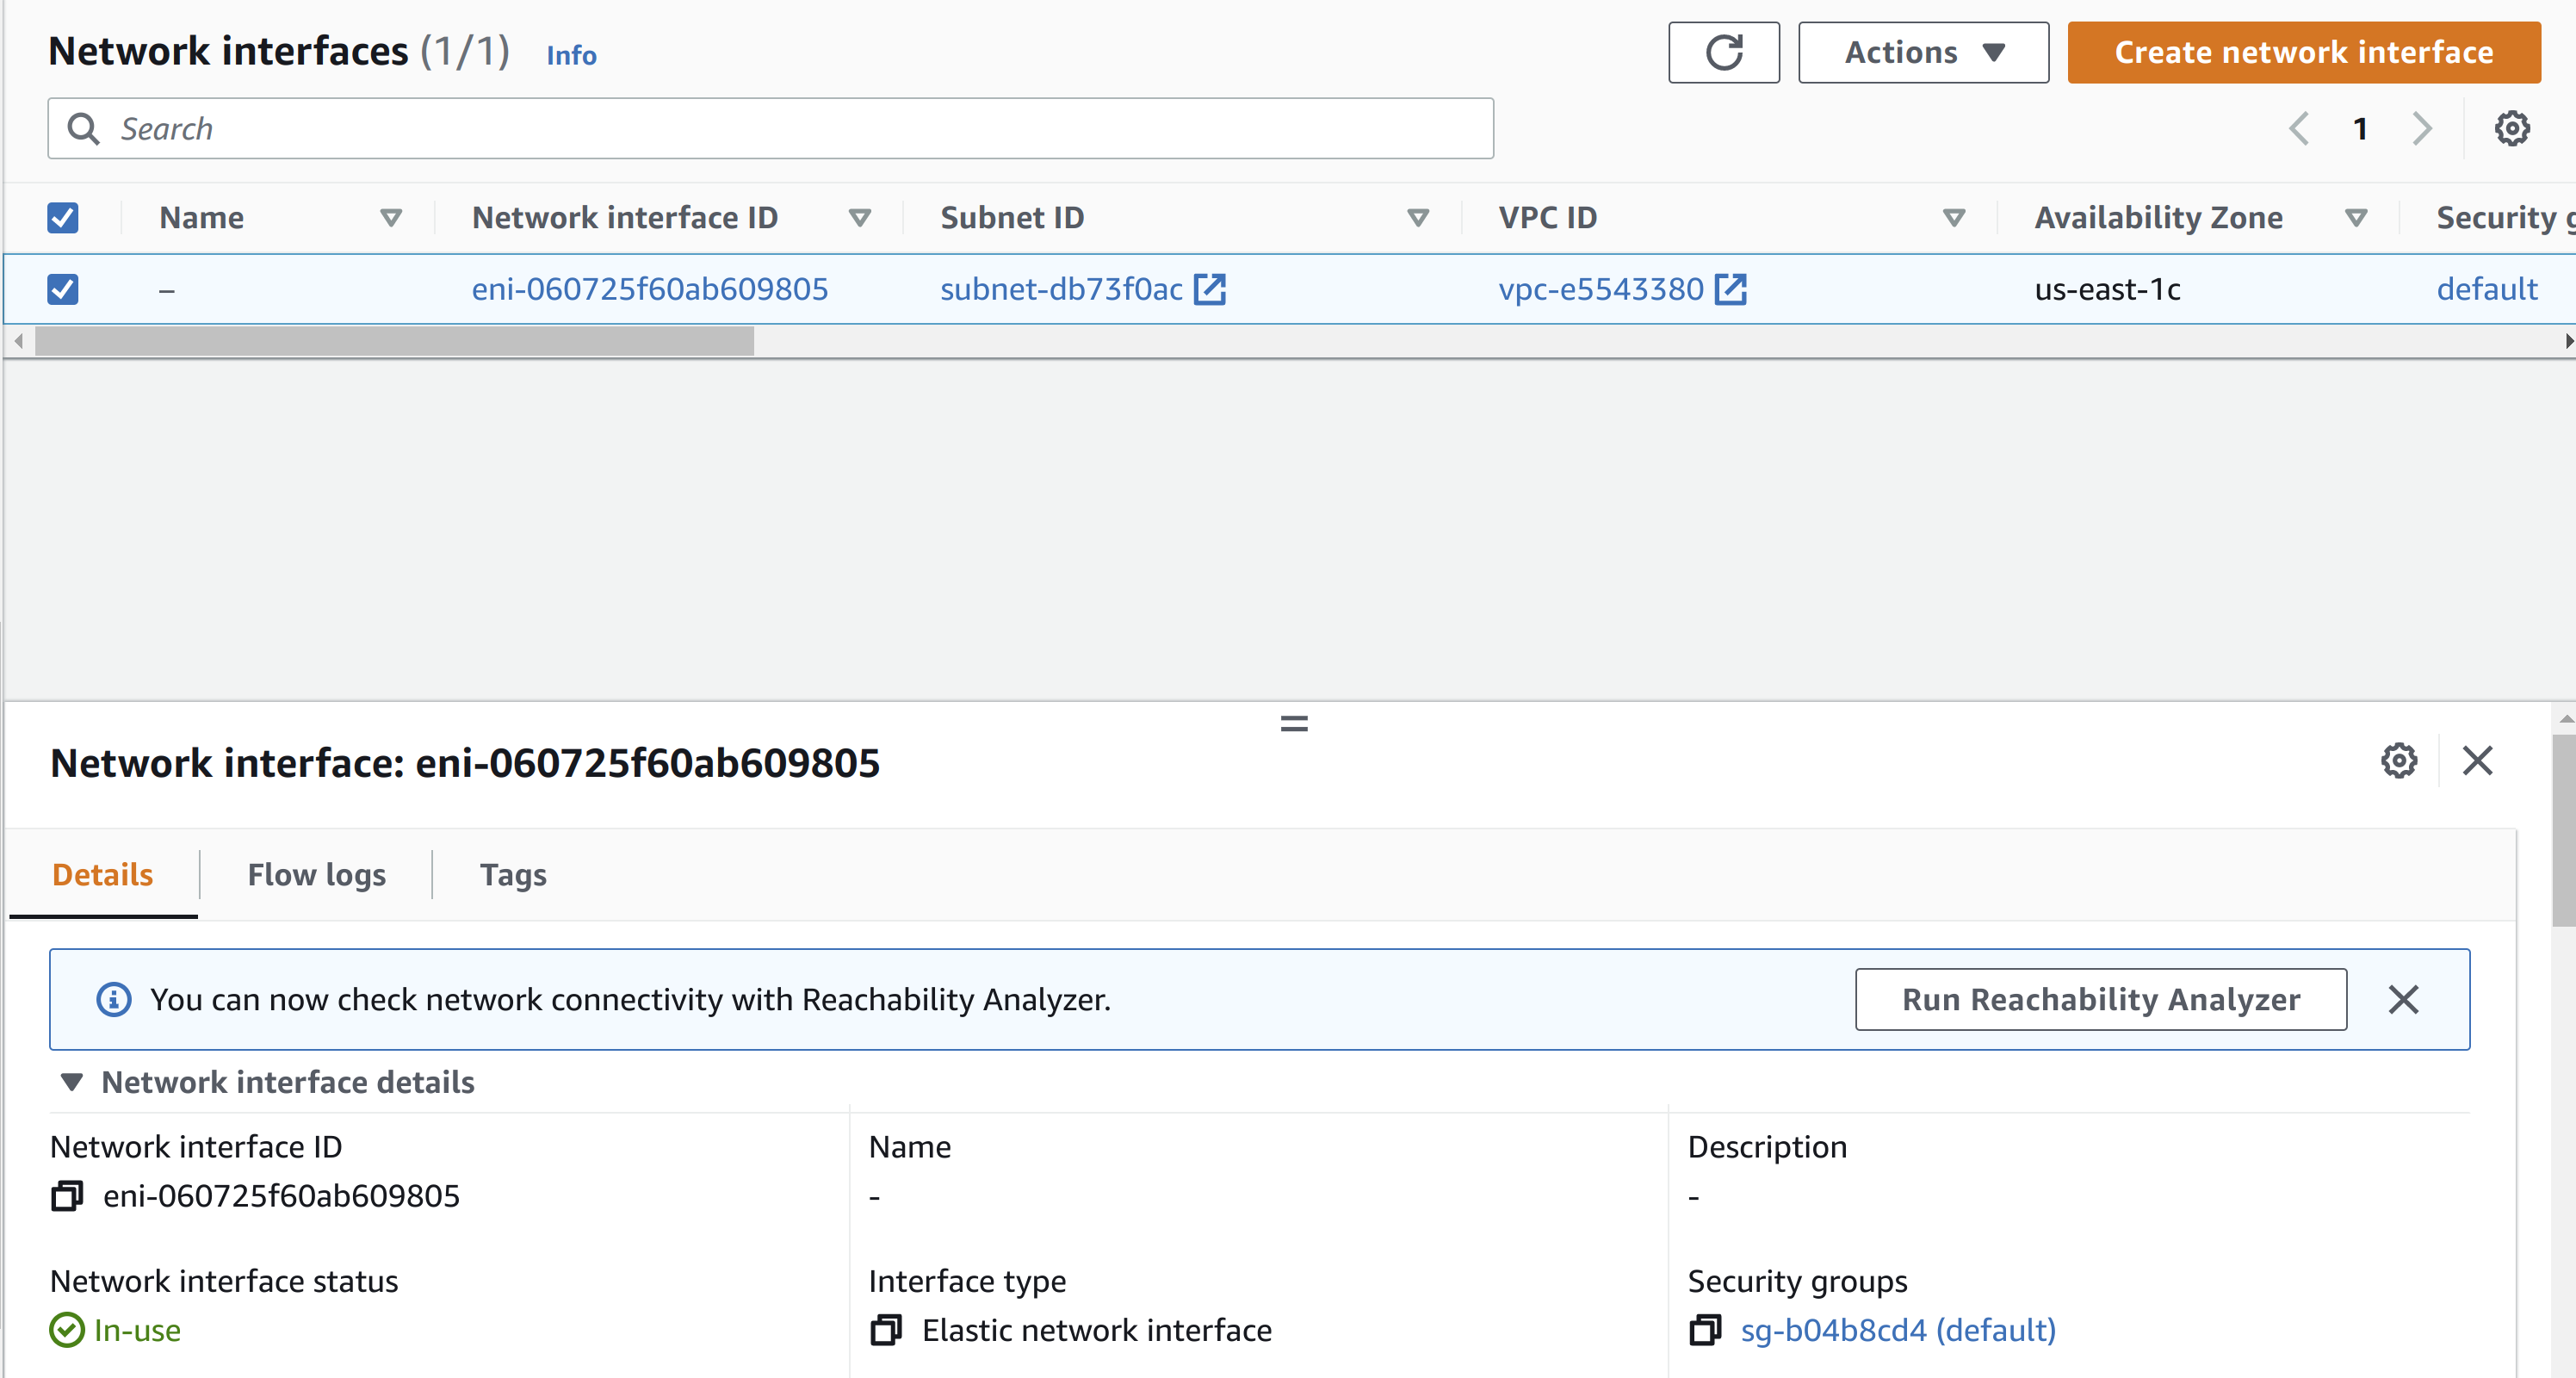
Network interfaces
Here are the network interfaces of all AWS services.
Load Balancer та Autoscaling будуть розглянуті в наступному пості
How to create ec2 with terraform
Using terraform, it is very easy to create an instance. For this, terraform has a resource called aws_instance.
The simplest code example will look like this
resource "aws_instance" "foo" {
  ami                    = "ami-0cff7528ff583bf9a"
  instance_type          = "t2.micro"
  subnet_id              = "subnet-db73f0ac"
  vpc_security_group_ids = ["sg-b04b8cd4"]
  tags = {
    Env = "Dev222"
  }
  volume_tags = {
    "Env" = "Dev"
  }

}
In this example, the terraform execute a resource named aws_instance, to which we pass a set of parameters, the same ones we passed when creating the instance through the UI.
Golang SDK
Another option for creating an instance is the AWS SDK, more specifically the Golang AWS SDK. To use it golang must be installed together with the AWS SDK
package main

import (
    "context"
    "log"

    "github.com/aws/aws-sdk-go-v2/aws"
    "github.com/aws/aws-sdk-go-v2/config"
    "github.com/aws/aws-sdk-go-v2/service/ec2"
    "github.com/aws/aws-sdk-go-v2/service/ec2/types"
)

func main() {
    // Load the Shared AWS Configuration (~/.aws/config)
    cfg, err := config.LoadDefaultConfig(context.TODO(),
        config.WithSharedConfigProfile("default"))
    if err != nil {
        log.Fatal(err)
    }

    client := ec2.NewFromConfig(cfg)

    input := &ec2.RunInstancesInput{
        ImageId:      aws.String("ami-0cff7528ff583bf9a"),
        InstanceType: types.InstanceTypeT2Micro,
        SubnetId:     aws.String("subnet-db73f0ac"),
        SecurityGroupIds: aws.ToStringSlice([]*string{
            aws.String("sg-b04b8cd4"),
        }),
        MaxCount: aws.Int32(1),
        MinCount: aws.Int32(1),
    }

    _, err = client.RunInstances(context.Background(), input)
    if err != nil {
        log.Fatal(err)
    }
}
Several events occur in the code. First, we create an AWS client in which I specify that I want to use a profile named default. The profile configuration itself is in the ~/.aws/credentials folder. AWS Access Key and Secret Key should be stored there. You can generate Access and Secret key for your user in the AWS UI.
In RunInstancesInput we specify the parameters with which we will create the instance. Here everything is the same as when creating with UI as when using terraform. And we create an instance with these parameters. The advantage of terraform over this method is that everything created by terraform can be removed using terraform destroy. In this case, you would need to create your logic for how to delete or delete resources from the UI.